Self-built Laptop
How it started
I have a small shoulder-bag I take everywhere. I often find myself wanting to take just that bag with me somewhere but also needing to take a laptop and having to take a whole backpack just for that laptop. Separately from this, during my summer last year, I often found myself sitting outside and programming. Sat on the grass outside my dormitory or on the local hillsides with friends. Around the time I'd started experimenting with E-Ink Screens for a small project I was considering starting and I realised they would be perfect for programming outdoors in bright environments. I'd also around this time wanted to try and create electronics that were resilient to outdoor environments.
From these 3 ideas I decided to try and create my own laptop that would fit within the 20x20cm space of my bag and was fully usable outside whilst remaining low-power enough for long trips.
The initial design
My first plan for this computer was a small rectangular slab, made of various layers of components and each made of an identical standardised frame. Each layer screwing together to form a sandwich of parts. The idea behind this being that it would be incredibly modular and simple to design and expand. This idea stuck around for a while but eventually got dropped as I hoped to make the electronics somewhat more accessible and because wanted a computer that wasn't just a flat slab of plastic.
My second idea was a flat rectangle but with its upper third on a friction hinge to allow it to be tilted and tightened. This idea has stuck around and is currently my main driving design. Whilst its somewhat more fragile, its a much more human and open design and in theory shouldn't be too much more complex to design.
The components
Most parts needed I've currently got or have bought, including:
- A raspberry pi 2 b+ I've had lying around for years
- An E-Ink screen bought for a previous project (more on this screen in a bit)
- 4 18650 Li-Ion batteries and a battery board for charging and power management
- A sim-card board for roaming data
E-ink display
The E-Ink display is a core part of this project and something I'm very excited for. I have a strong love of E-ink displays as things that are incredibly energy efficient, usable in almost any conditions and are a bit slower than normal screens proposing some really interesting challenges in terms of UI design.
As a basic summary, these screens are black and white displays that look very similar to paper. They don't use lights to produce colours and instead change their reflectiveness by controlling the charge of ink particles in little chambers of oil in their surface. This has a really nice effect of allowing them to work with the ambient light around them. The outcome of this being that they're are visible just about anywhere you can read paper and have an amazing viewing angle. Their only drawback being a slow refresh rate and a very small colour range, each added colour adds around 1-5 seconds to the refresh rate so generally they come in black and white only.
I find this limited refresh rate a really interesting challenge and in terms of what I'd be using this laptop for (programming) it wouldn't be too big of a drawback.
People have been experimenting with E-Ink screens a lot in the past few years and even got them to a point where they can display functional desktops, which I think is really amazing. However despite this I feel that a terminal would be a really interesting limit to put on myself when using this laptop. As well as this, the screen I have bought is incredibly small (2.13 inches diagonally) and I am somewhat determined to work with it, this making desktops somewhat harder to use.
I spent a long time working with E-ink displays and rewriting their drivers for this project. I'll be writing and attaching a blog-post on this soon.
The battery pack
The power source for this laptop is just a set of 4 Li-Ion batteries, googling this setup most people claim it could power a raspberry pi with a display for around an hour, and for around 10 hours without a display out outputs.
This wouldn't be a great battery life for most devices but using an E-ink display runs means we can run the display directly from the Rpi's 3v gpio pin and it only ever consumes power on refreshes so I think this could last much longer. Its something I definitely want to try and measure once this project is finished.
The sim-card
If I'm wanting to use this laptop outdoors, it would be nice to be able to do so without having to tether it to my phones Wi-Fi hotspot. After a bit of research I found hats and boards for the raspberry that support sim-cards and support most protocols. This seems like a really fun chance to explore a technology I've barely ever touched.
The Keyboard
The keyboard has by far been the biggest challenge of this project, There are no keyboards small enough for what I'm wanting whilst still having big enough keys for what I want. My two options I have at the moment are:
- Bring a bluetooth keyboard
- Design my own
Bringing a bluetooth keyboard seems like the most realistic option and is most likely the one I will go with, but I have done research into keyboard layouts I could use, including a really unique one a friend suggested which I ended up testing out.
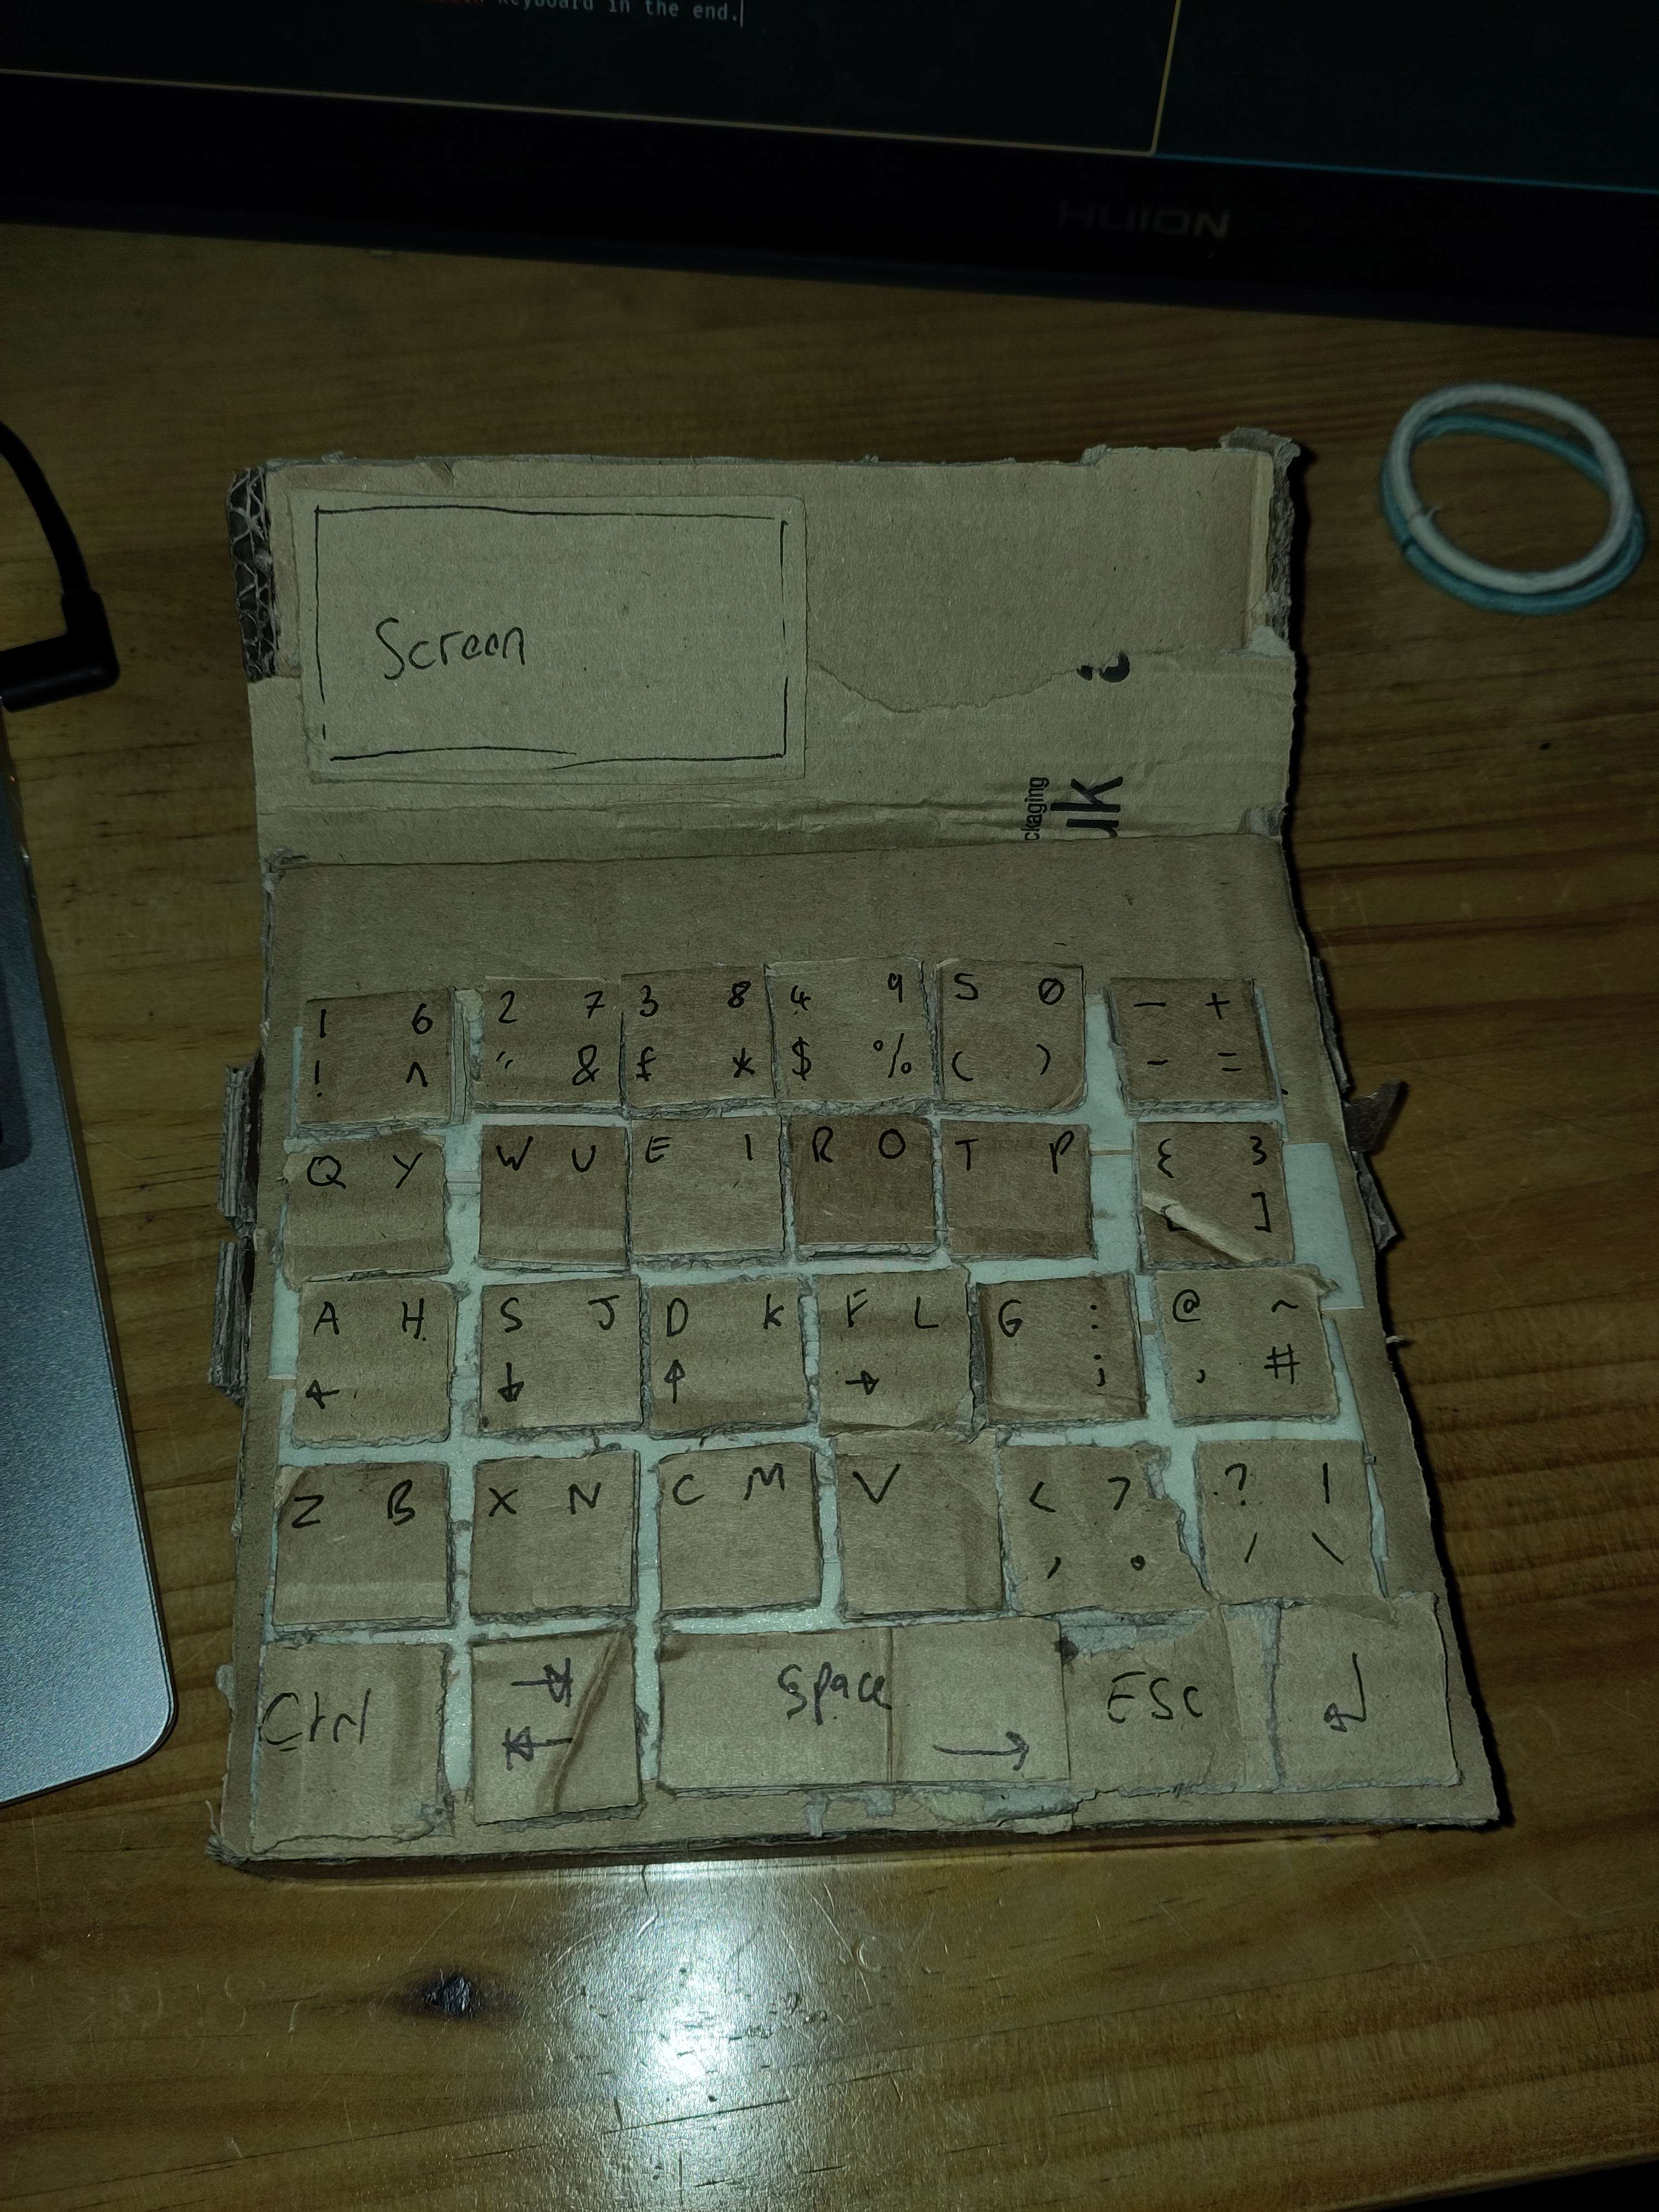
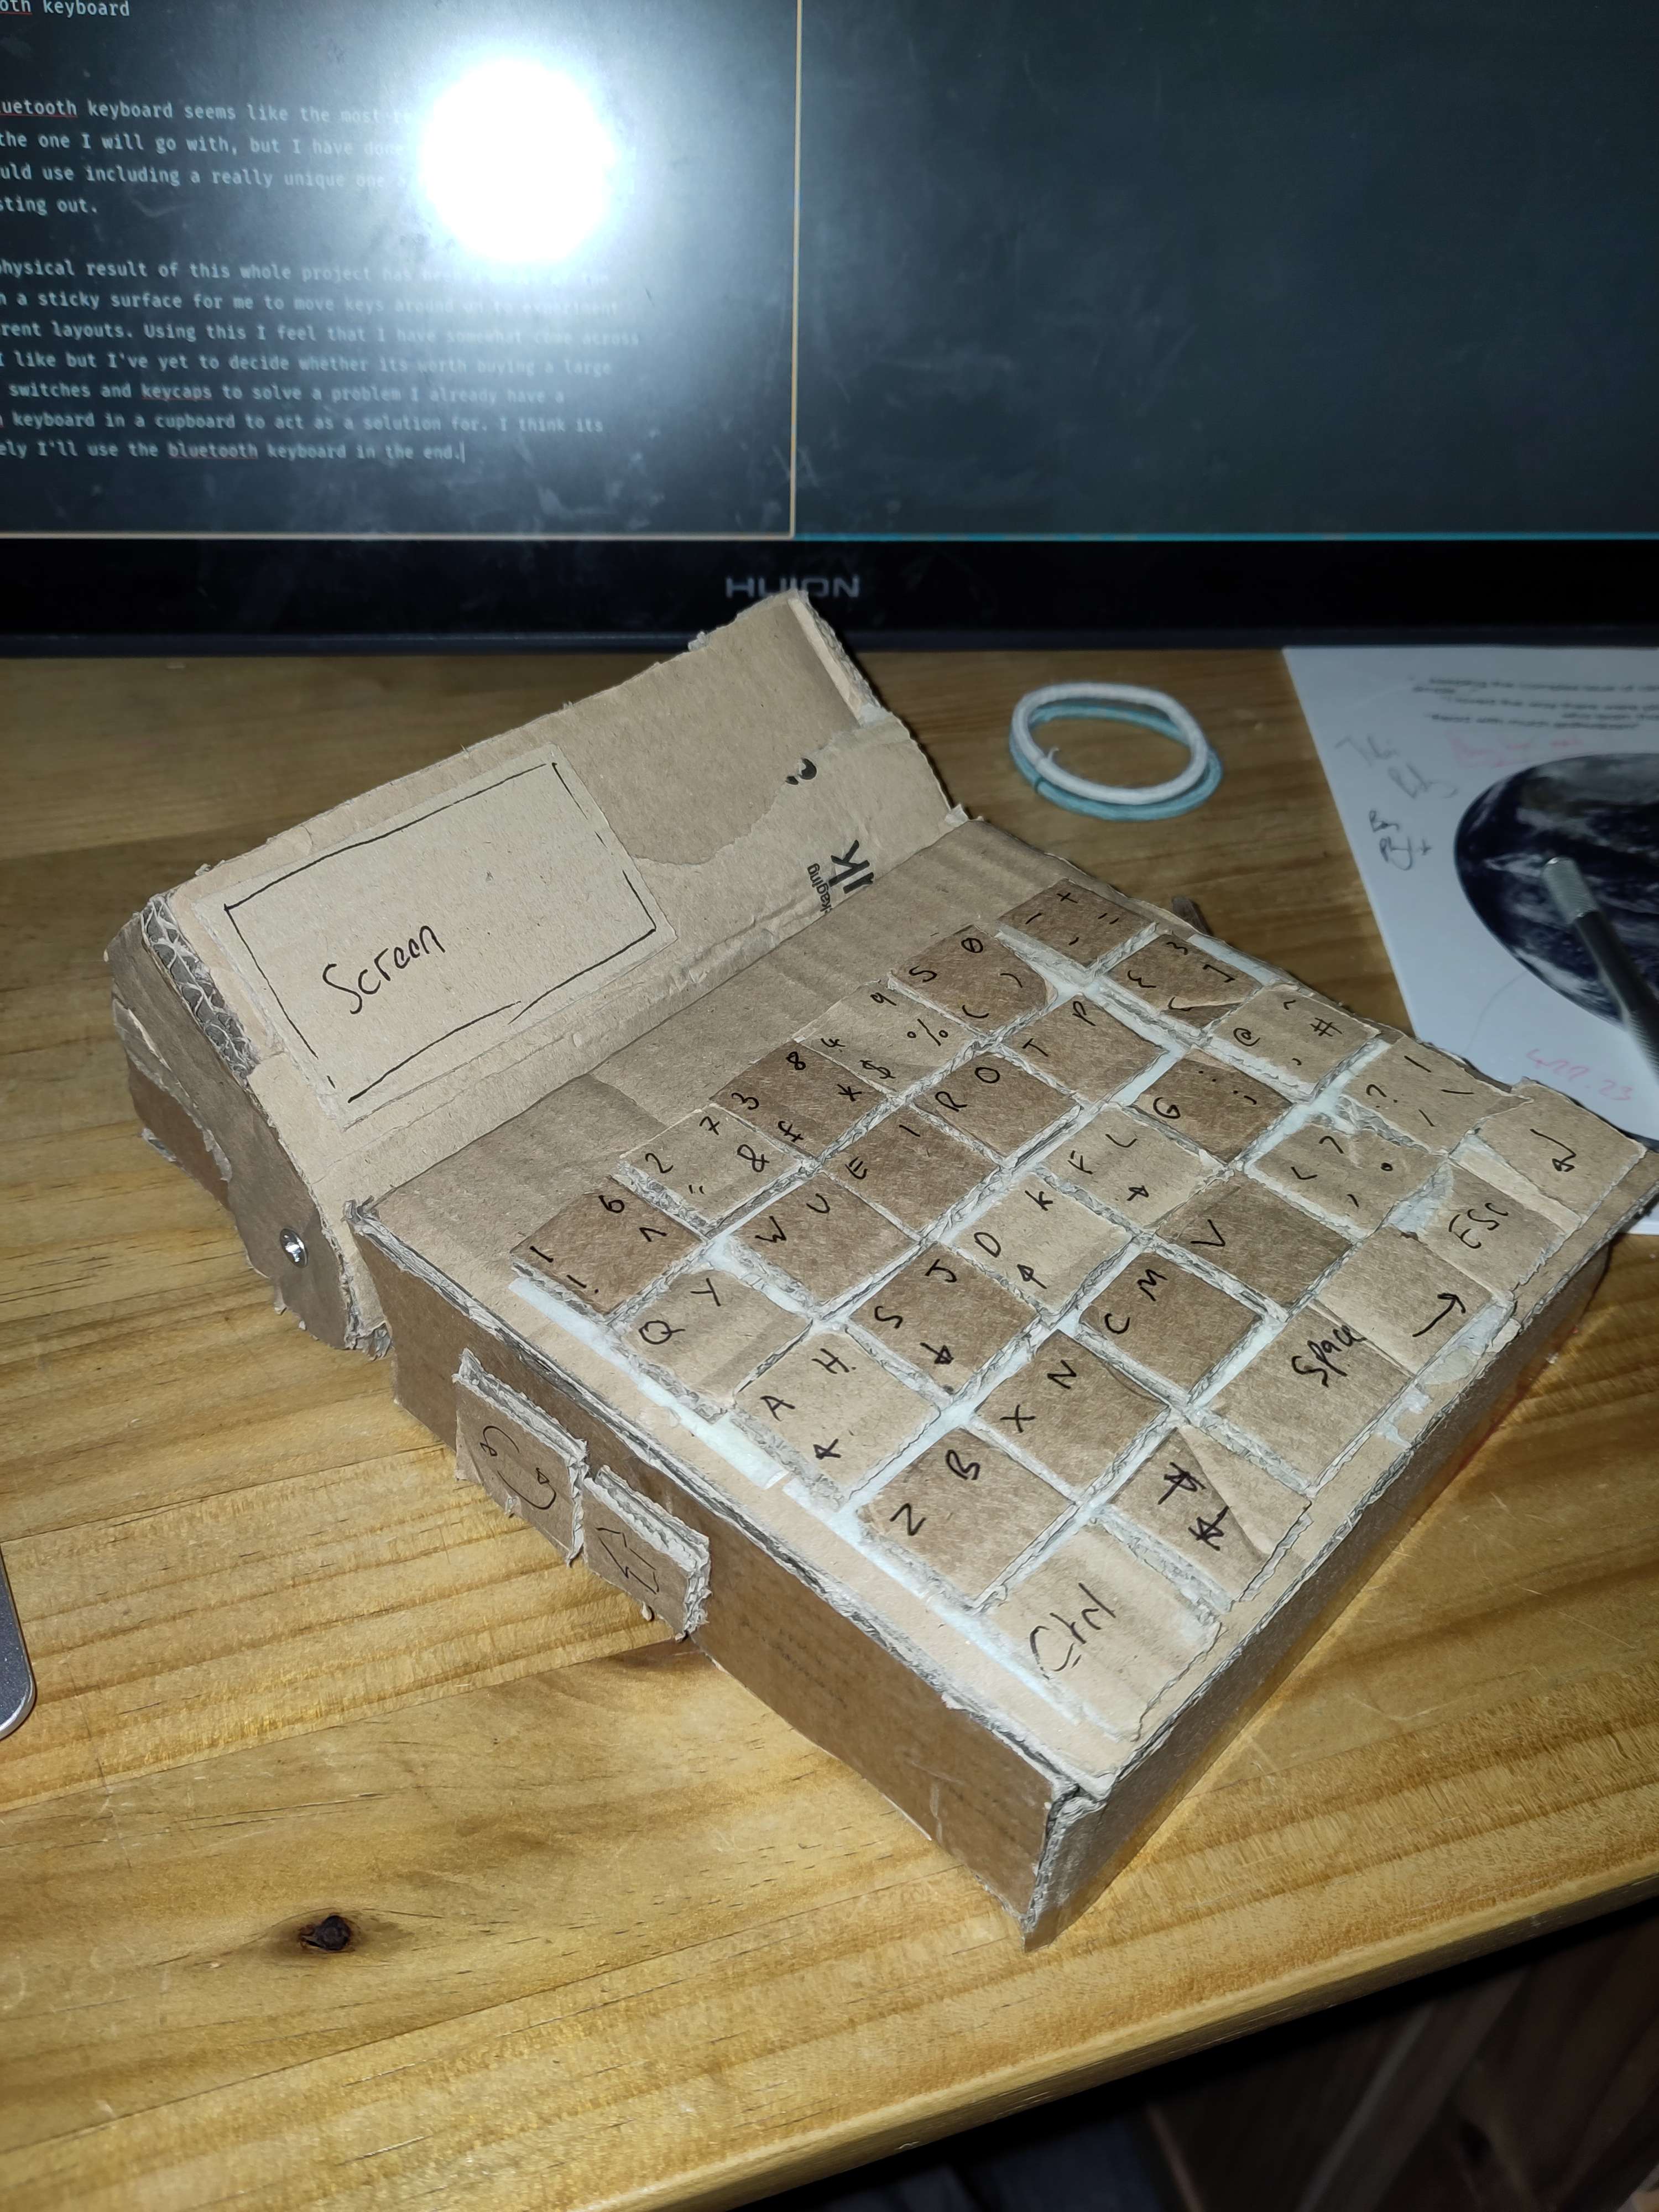
The first physical result of this whole project has been a model of the laptop with a sticky surface for me to move keys around on. This has allowed me to experiment with different layouts and see how they feel in my hands. Using this I feel that I have somewhat come across a design I like but I've yet to decide whether its worth buying a large amount of switches and keycaps to solve a problem I already have a solution for (bluetooth keyboard).
Progress Update 4/1/2024 - Little Things
Over this Christmas break a number of large steps have been taken, leaving me pretty close to finishing this project!
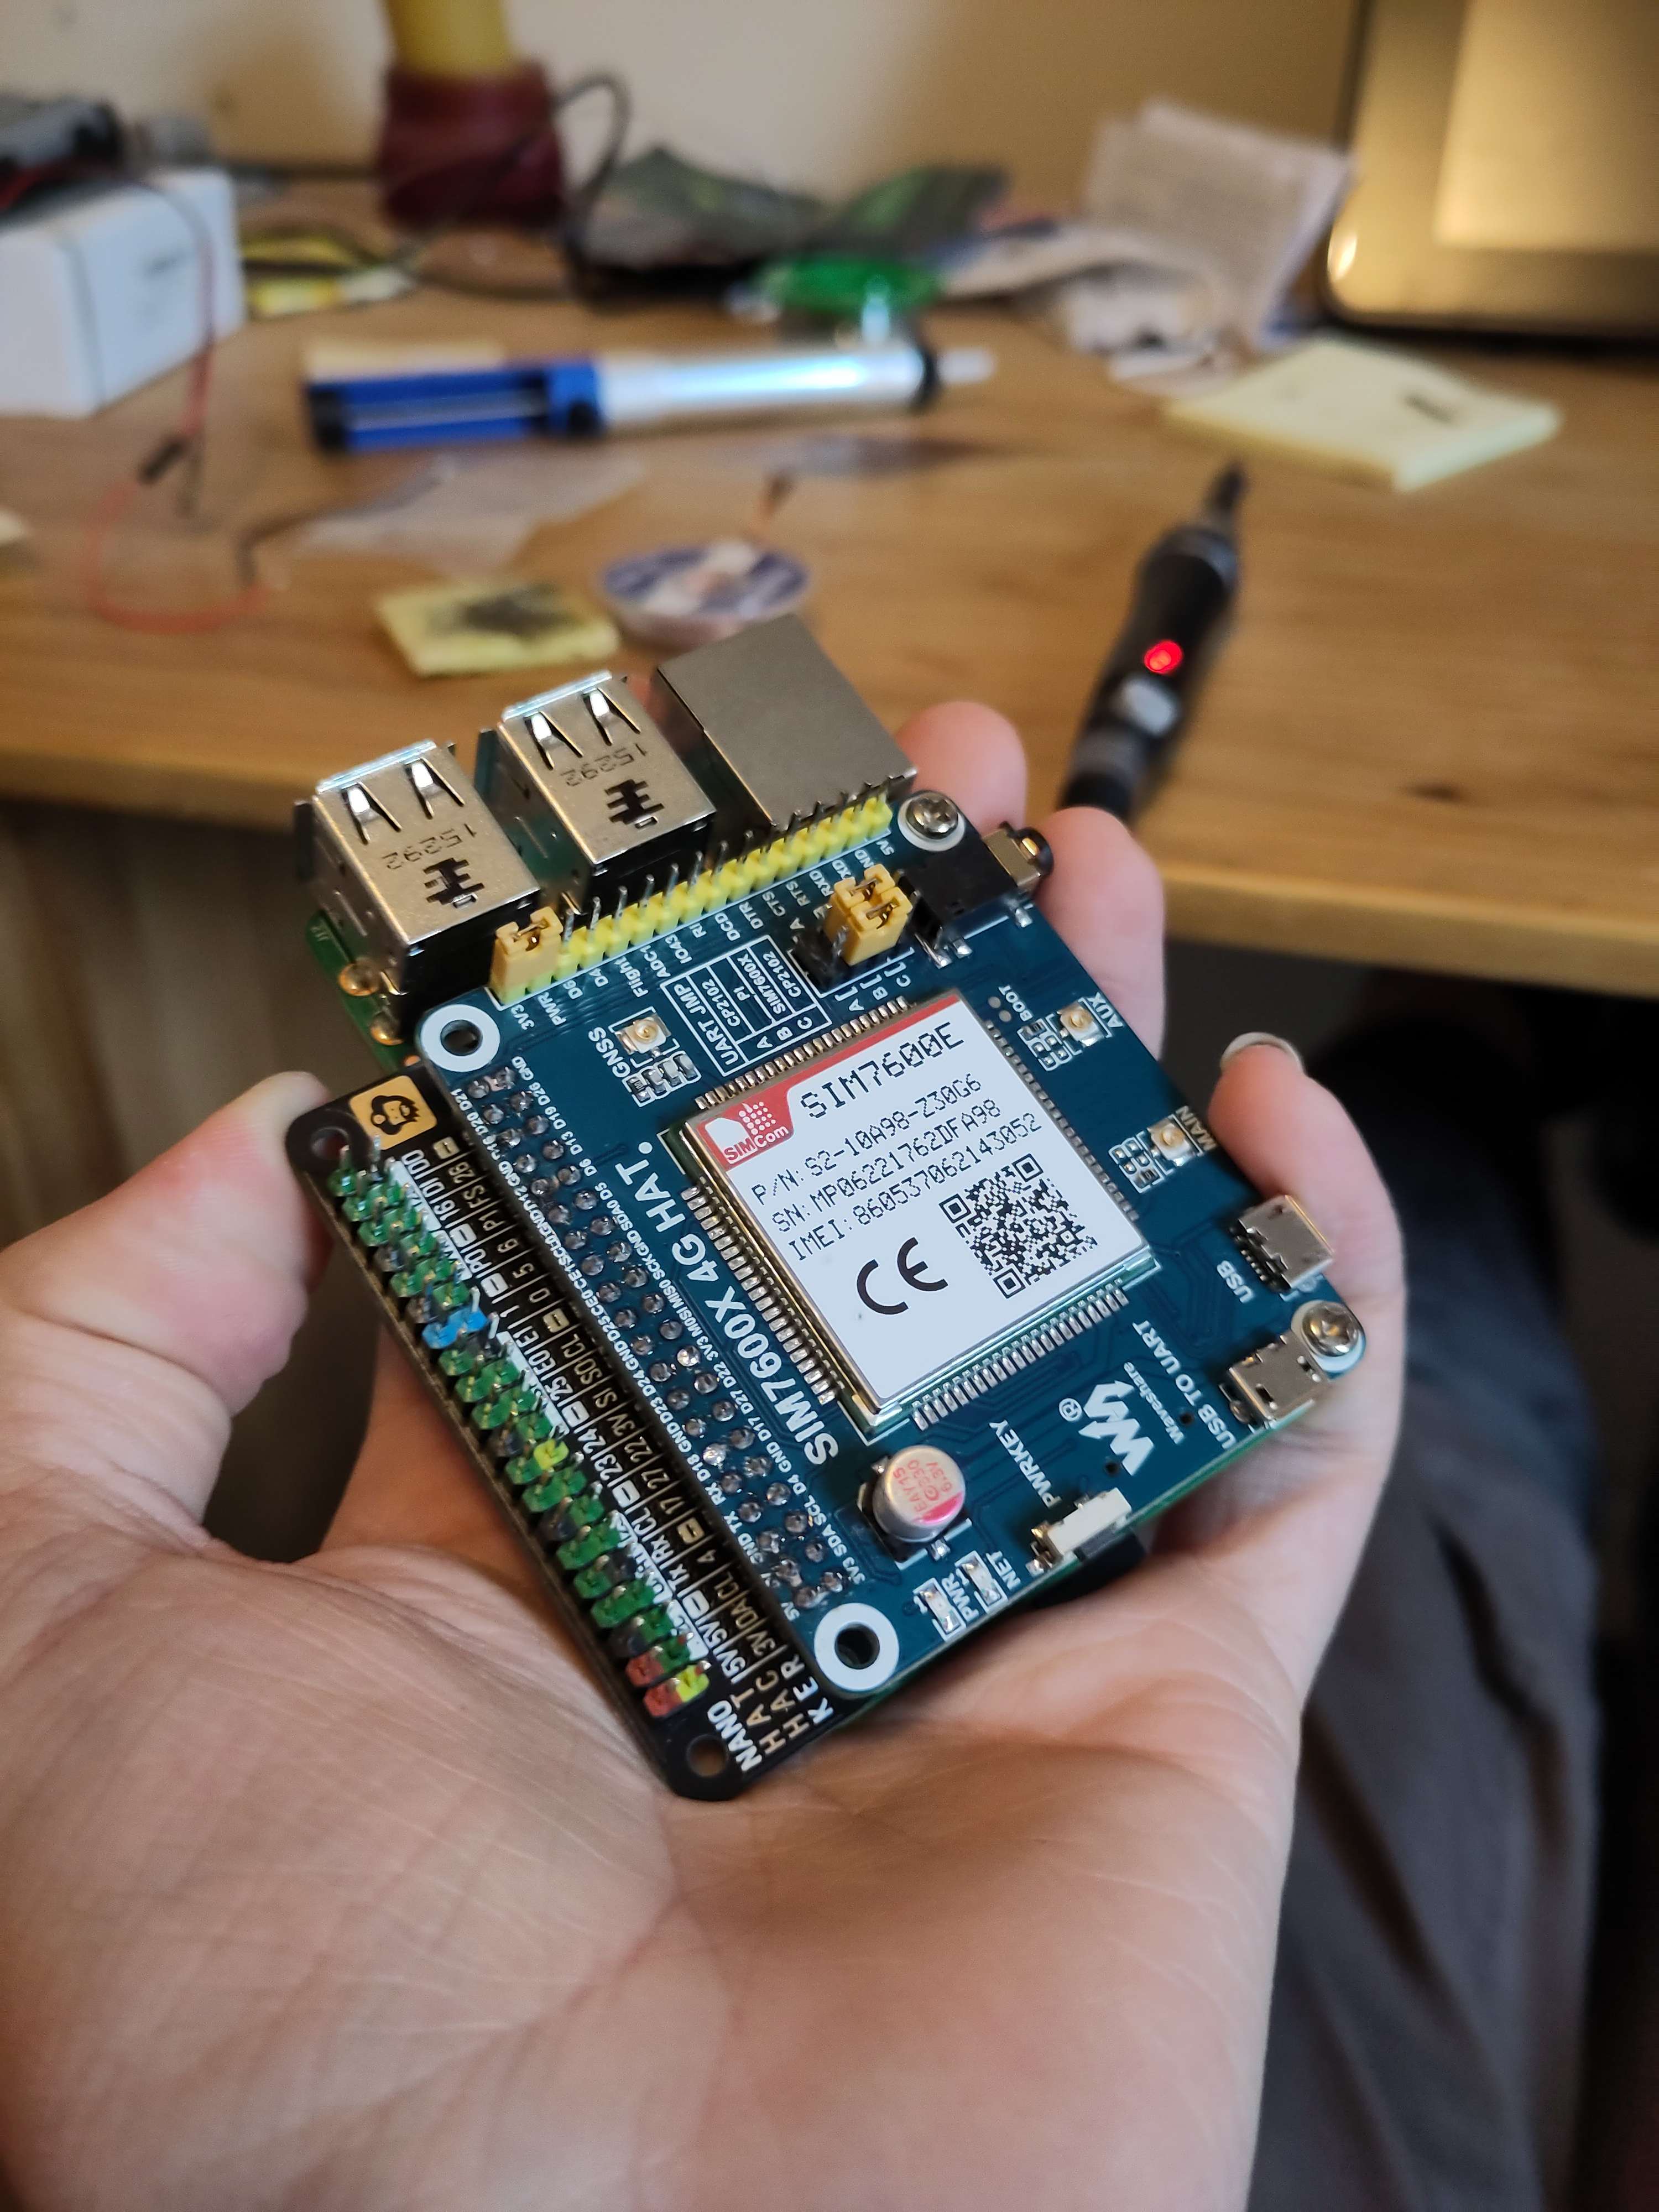
- I was given a SIM7600E hat for my Pi as a gift, meaning I now have the final missing piece of my hardware! Getting this working took a few days but its now ready to give my laptop 4G data. In theory it could also allow for phone calls and GPS tracking but I don't really have the time to write the programs for these at the moment and it feels like something I wouldn't use too much.
- The final decision has been made on the keyboard, I have a bluetooth one I'm happy using. This keeps my project a bit more realistic as designing a keyboard would likely double the amount of work for this.
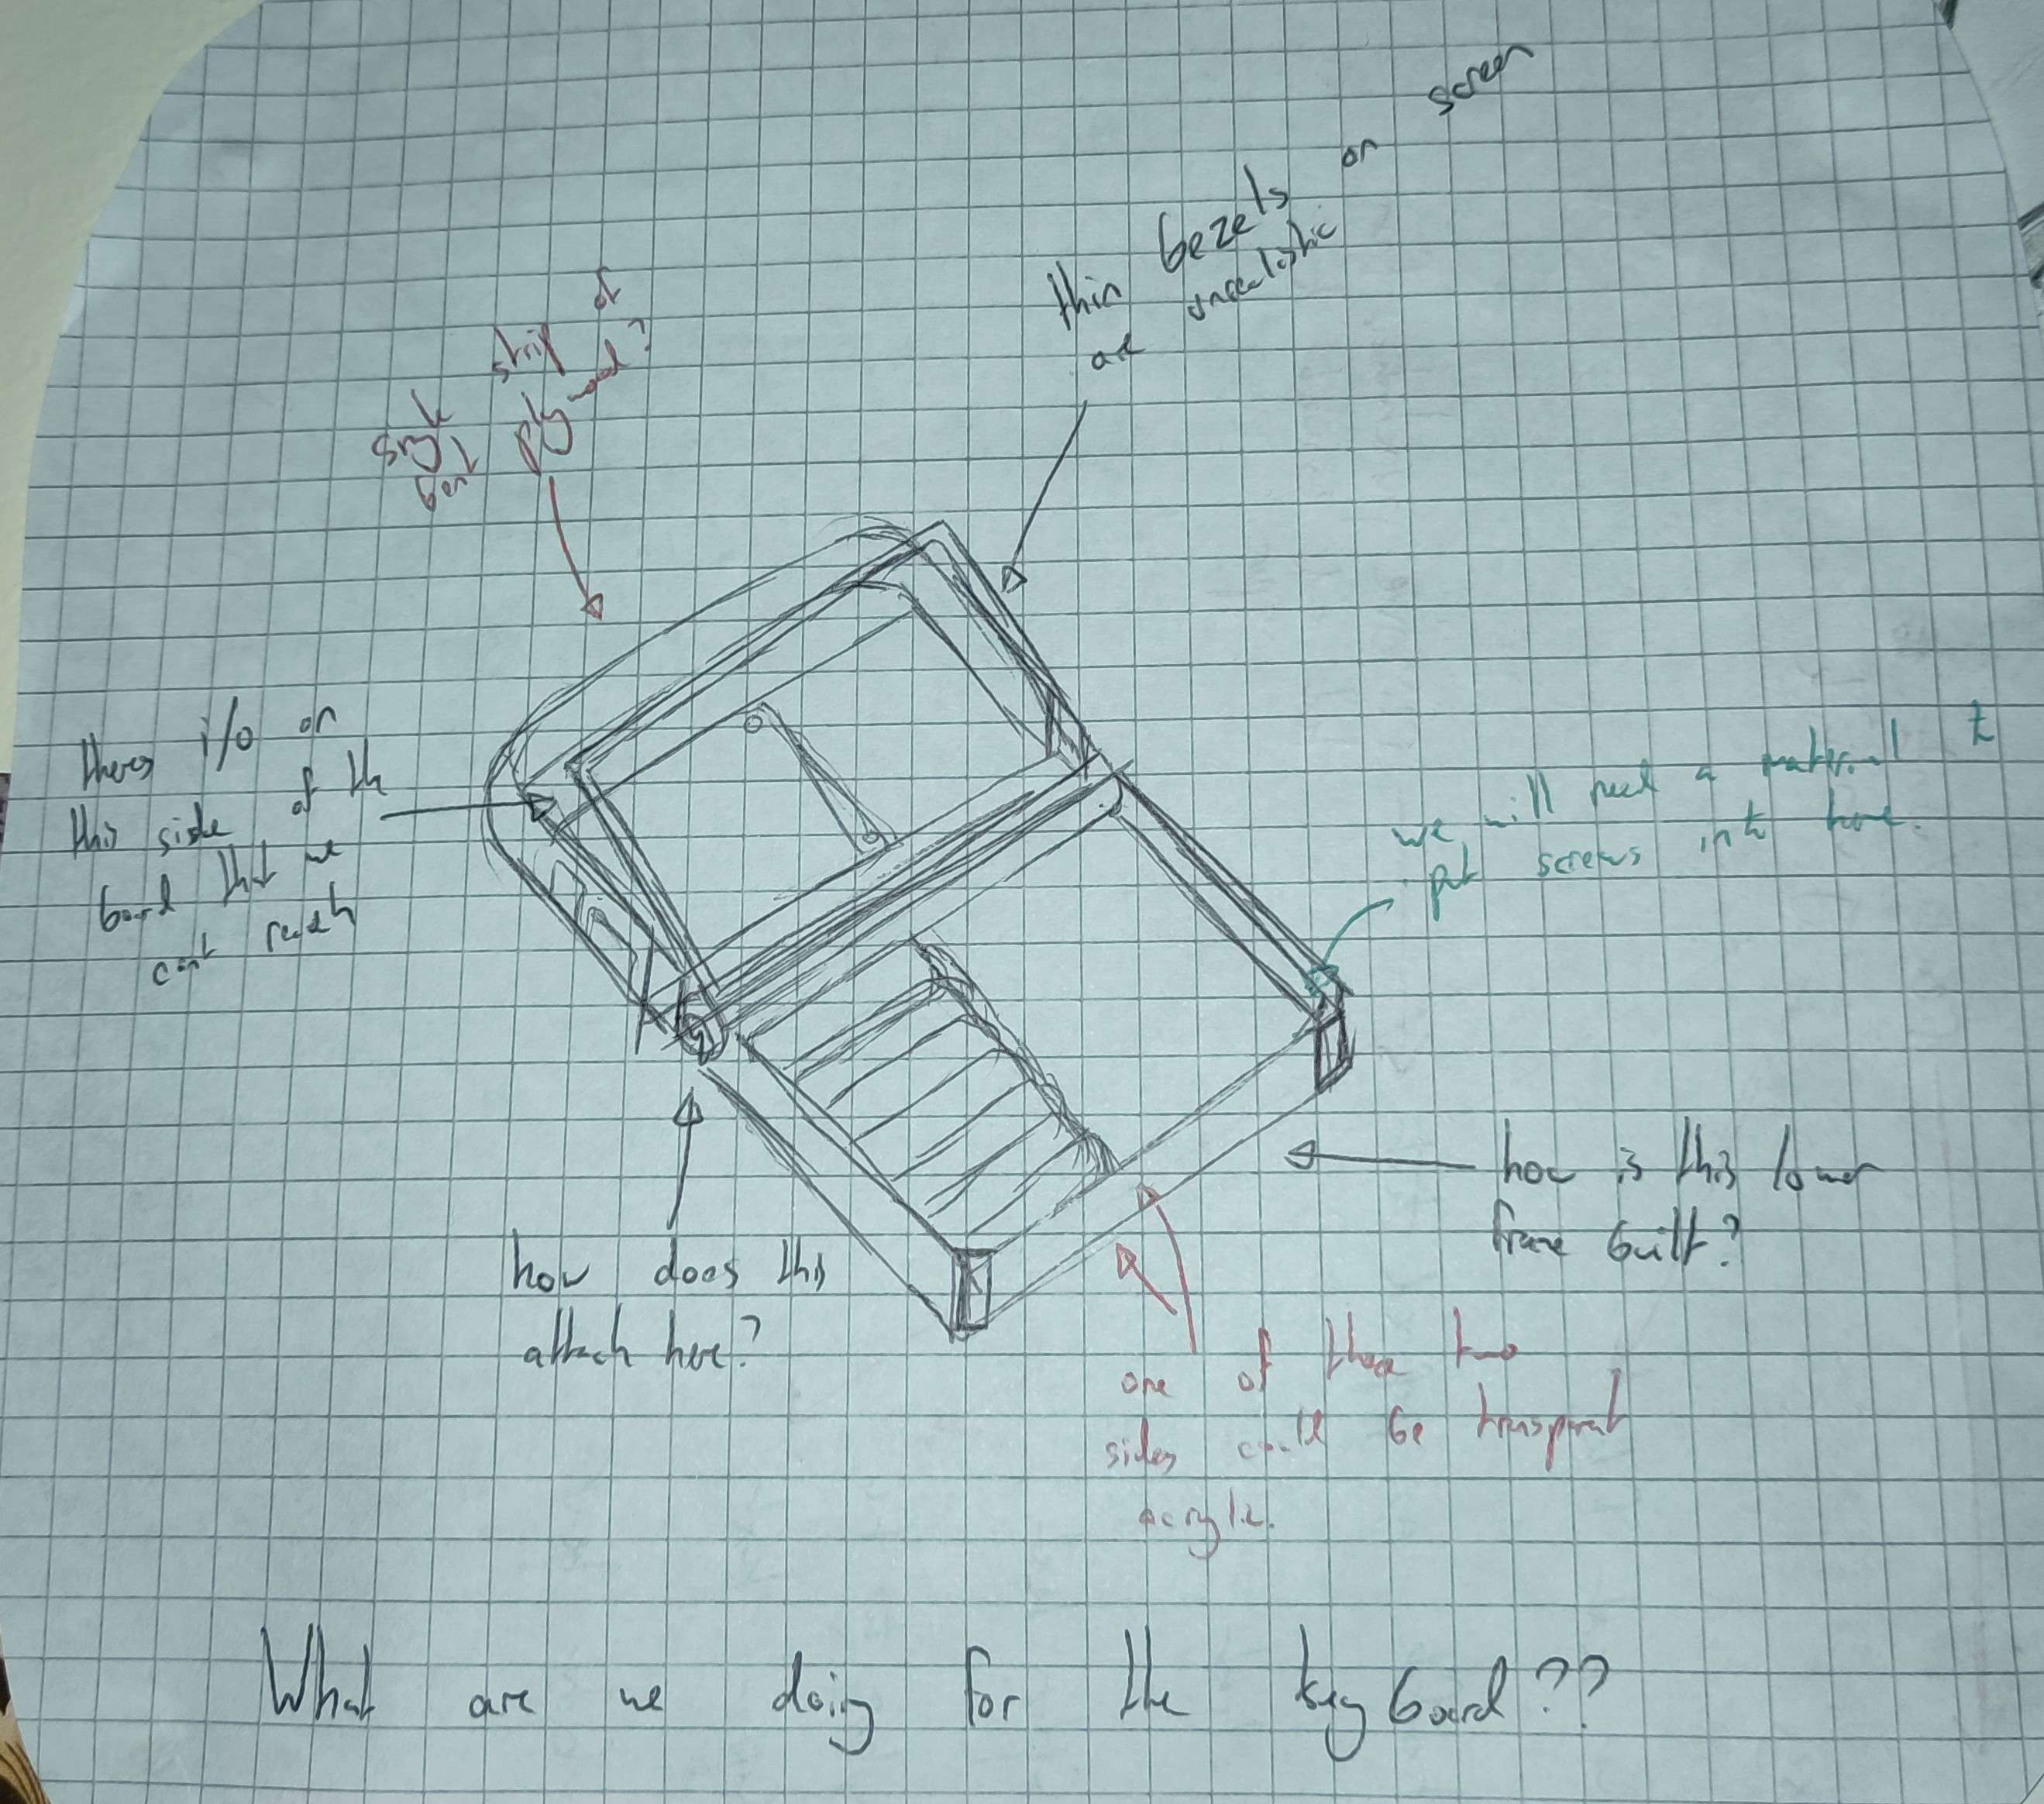
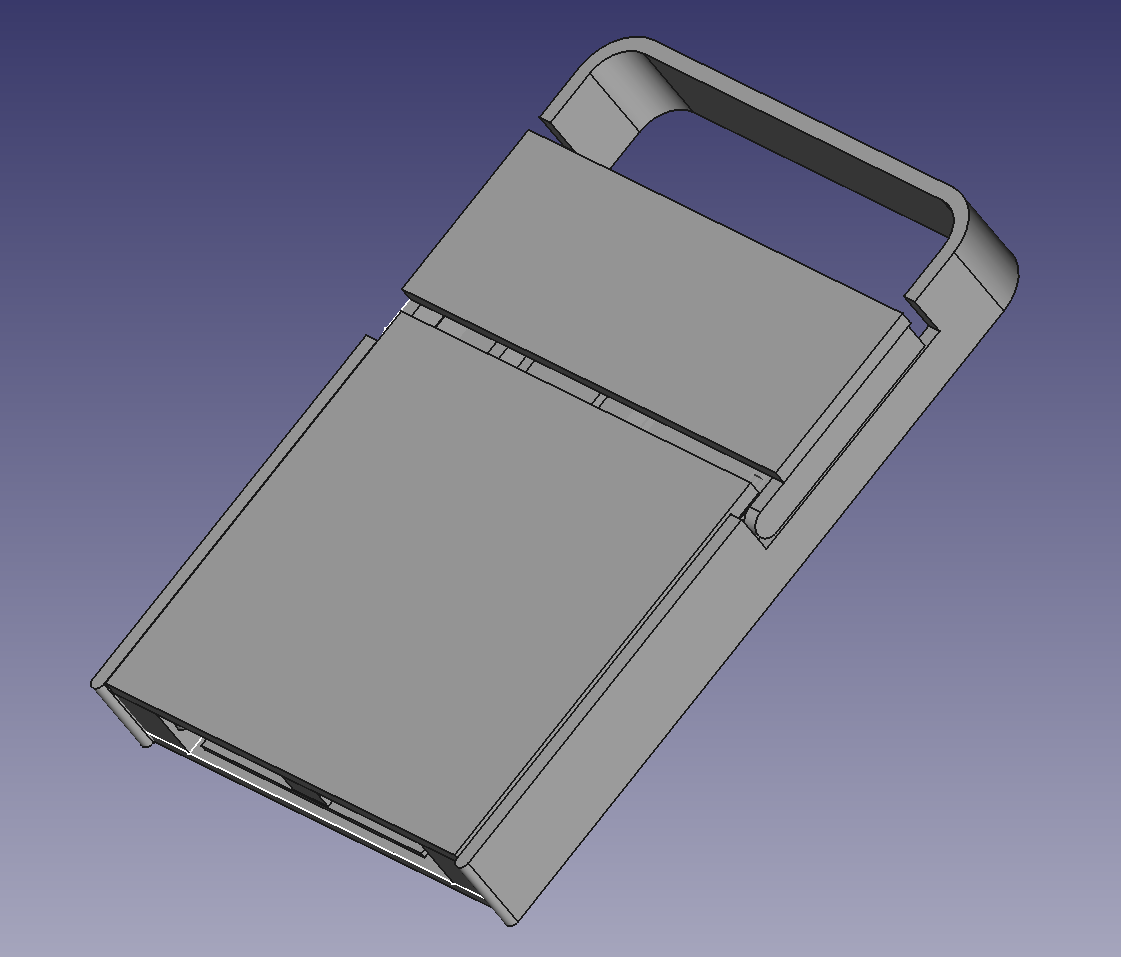
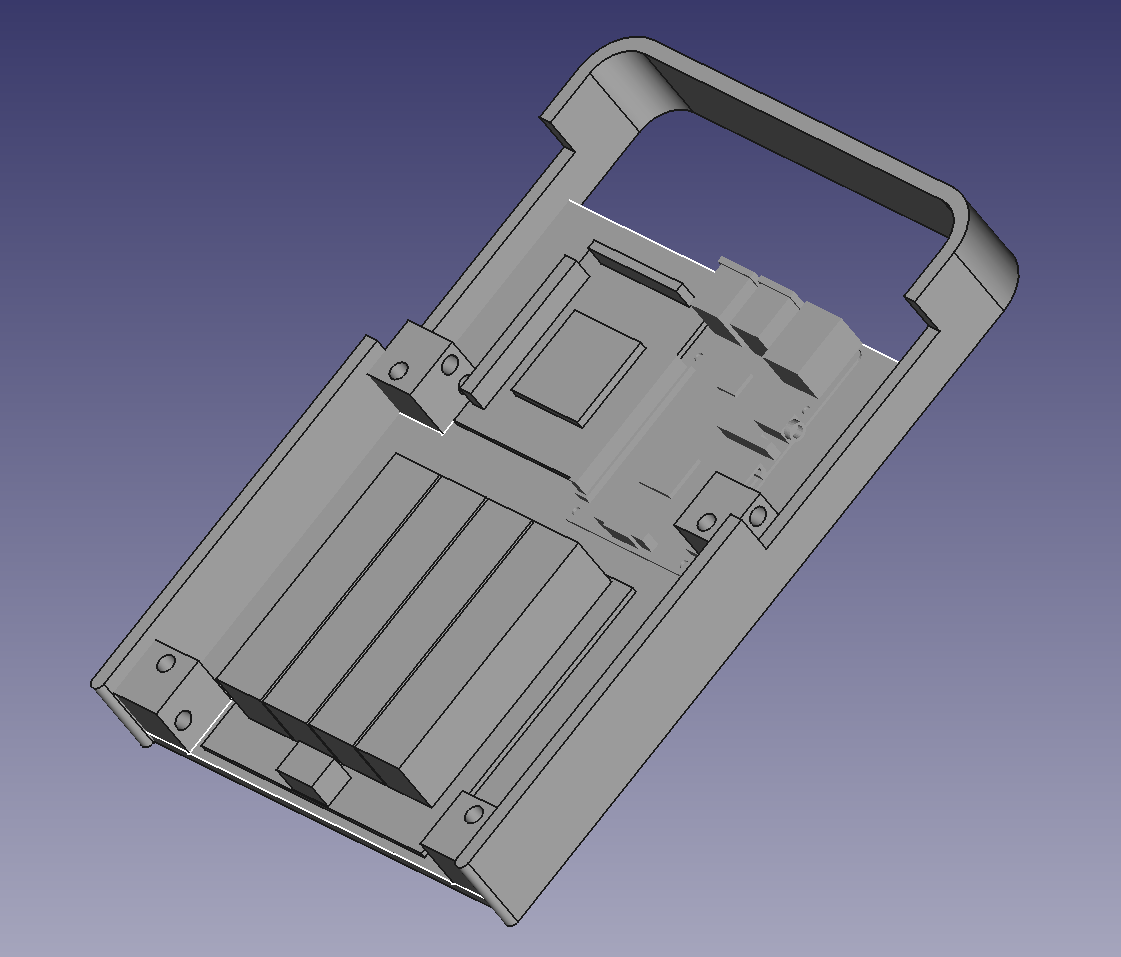
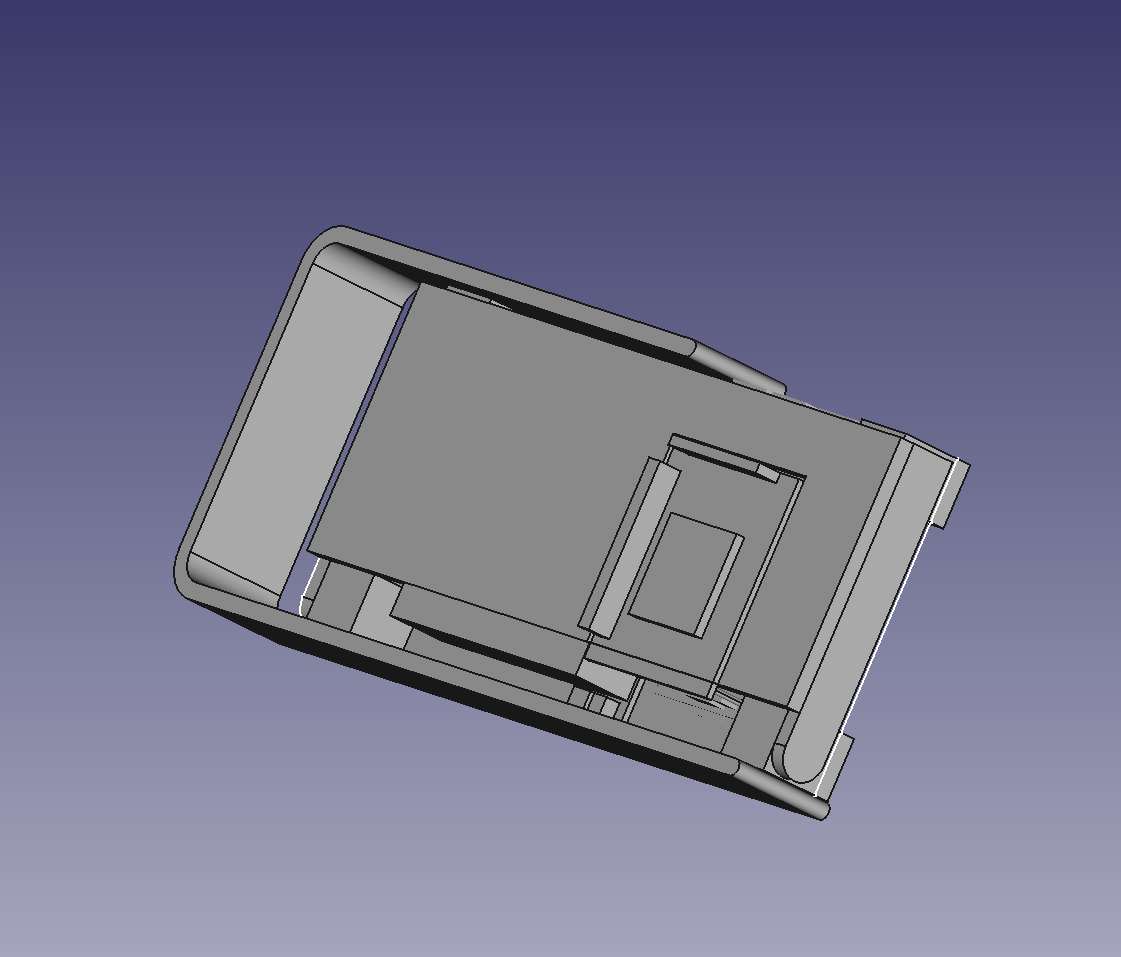
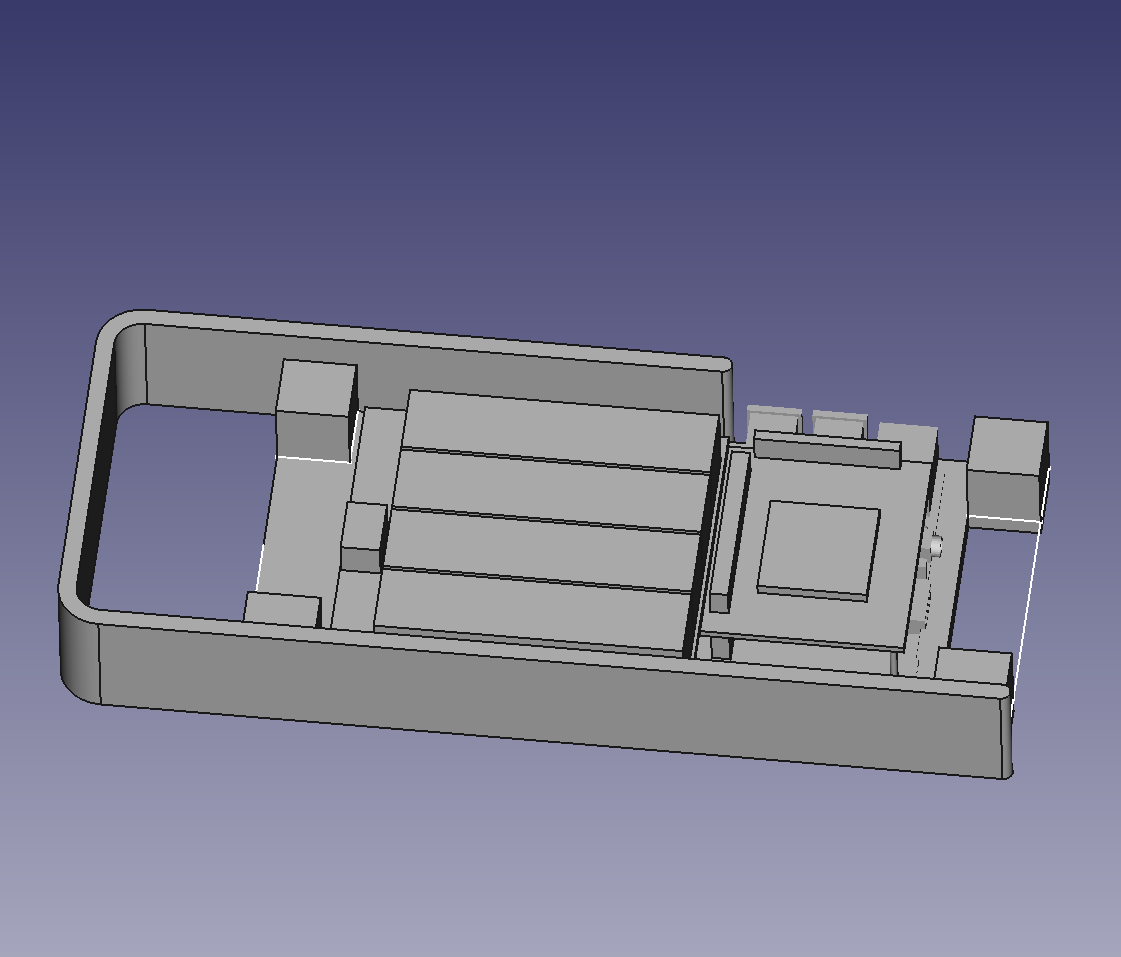
- A final CAD design has been made and checked with an engineer friend, images below. I've created two versions. The first follows the original design and still holds space for a keyboard or other form of expansion. The second has removed this space but is slightly thicker as it places the hat on the pi. I'm really happy with these and they're essentially ready to be built.
- I met up with a friend who will help me with the wood working, we talked through tweaks needed to make the design more realistic to machine and the processes we would use for each part. This turned out better than I could have hoped and its turned out we'll get to do some really fun work, for instance we plan to do some wood bending which is something I've always wanted to try!
I'm really happy with my progress over this two week break. Its a shame the final wood work will have to wait till Easter but its just how things are with exams.
Progress Update 10/2/2024 - Re-soldering headers
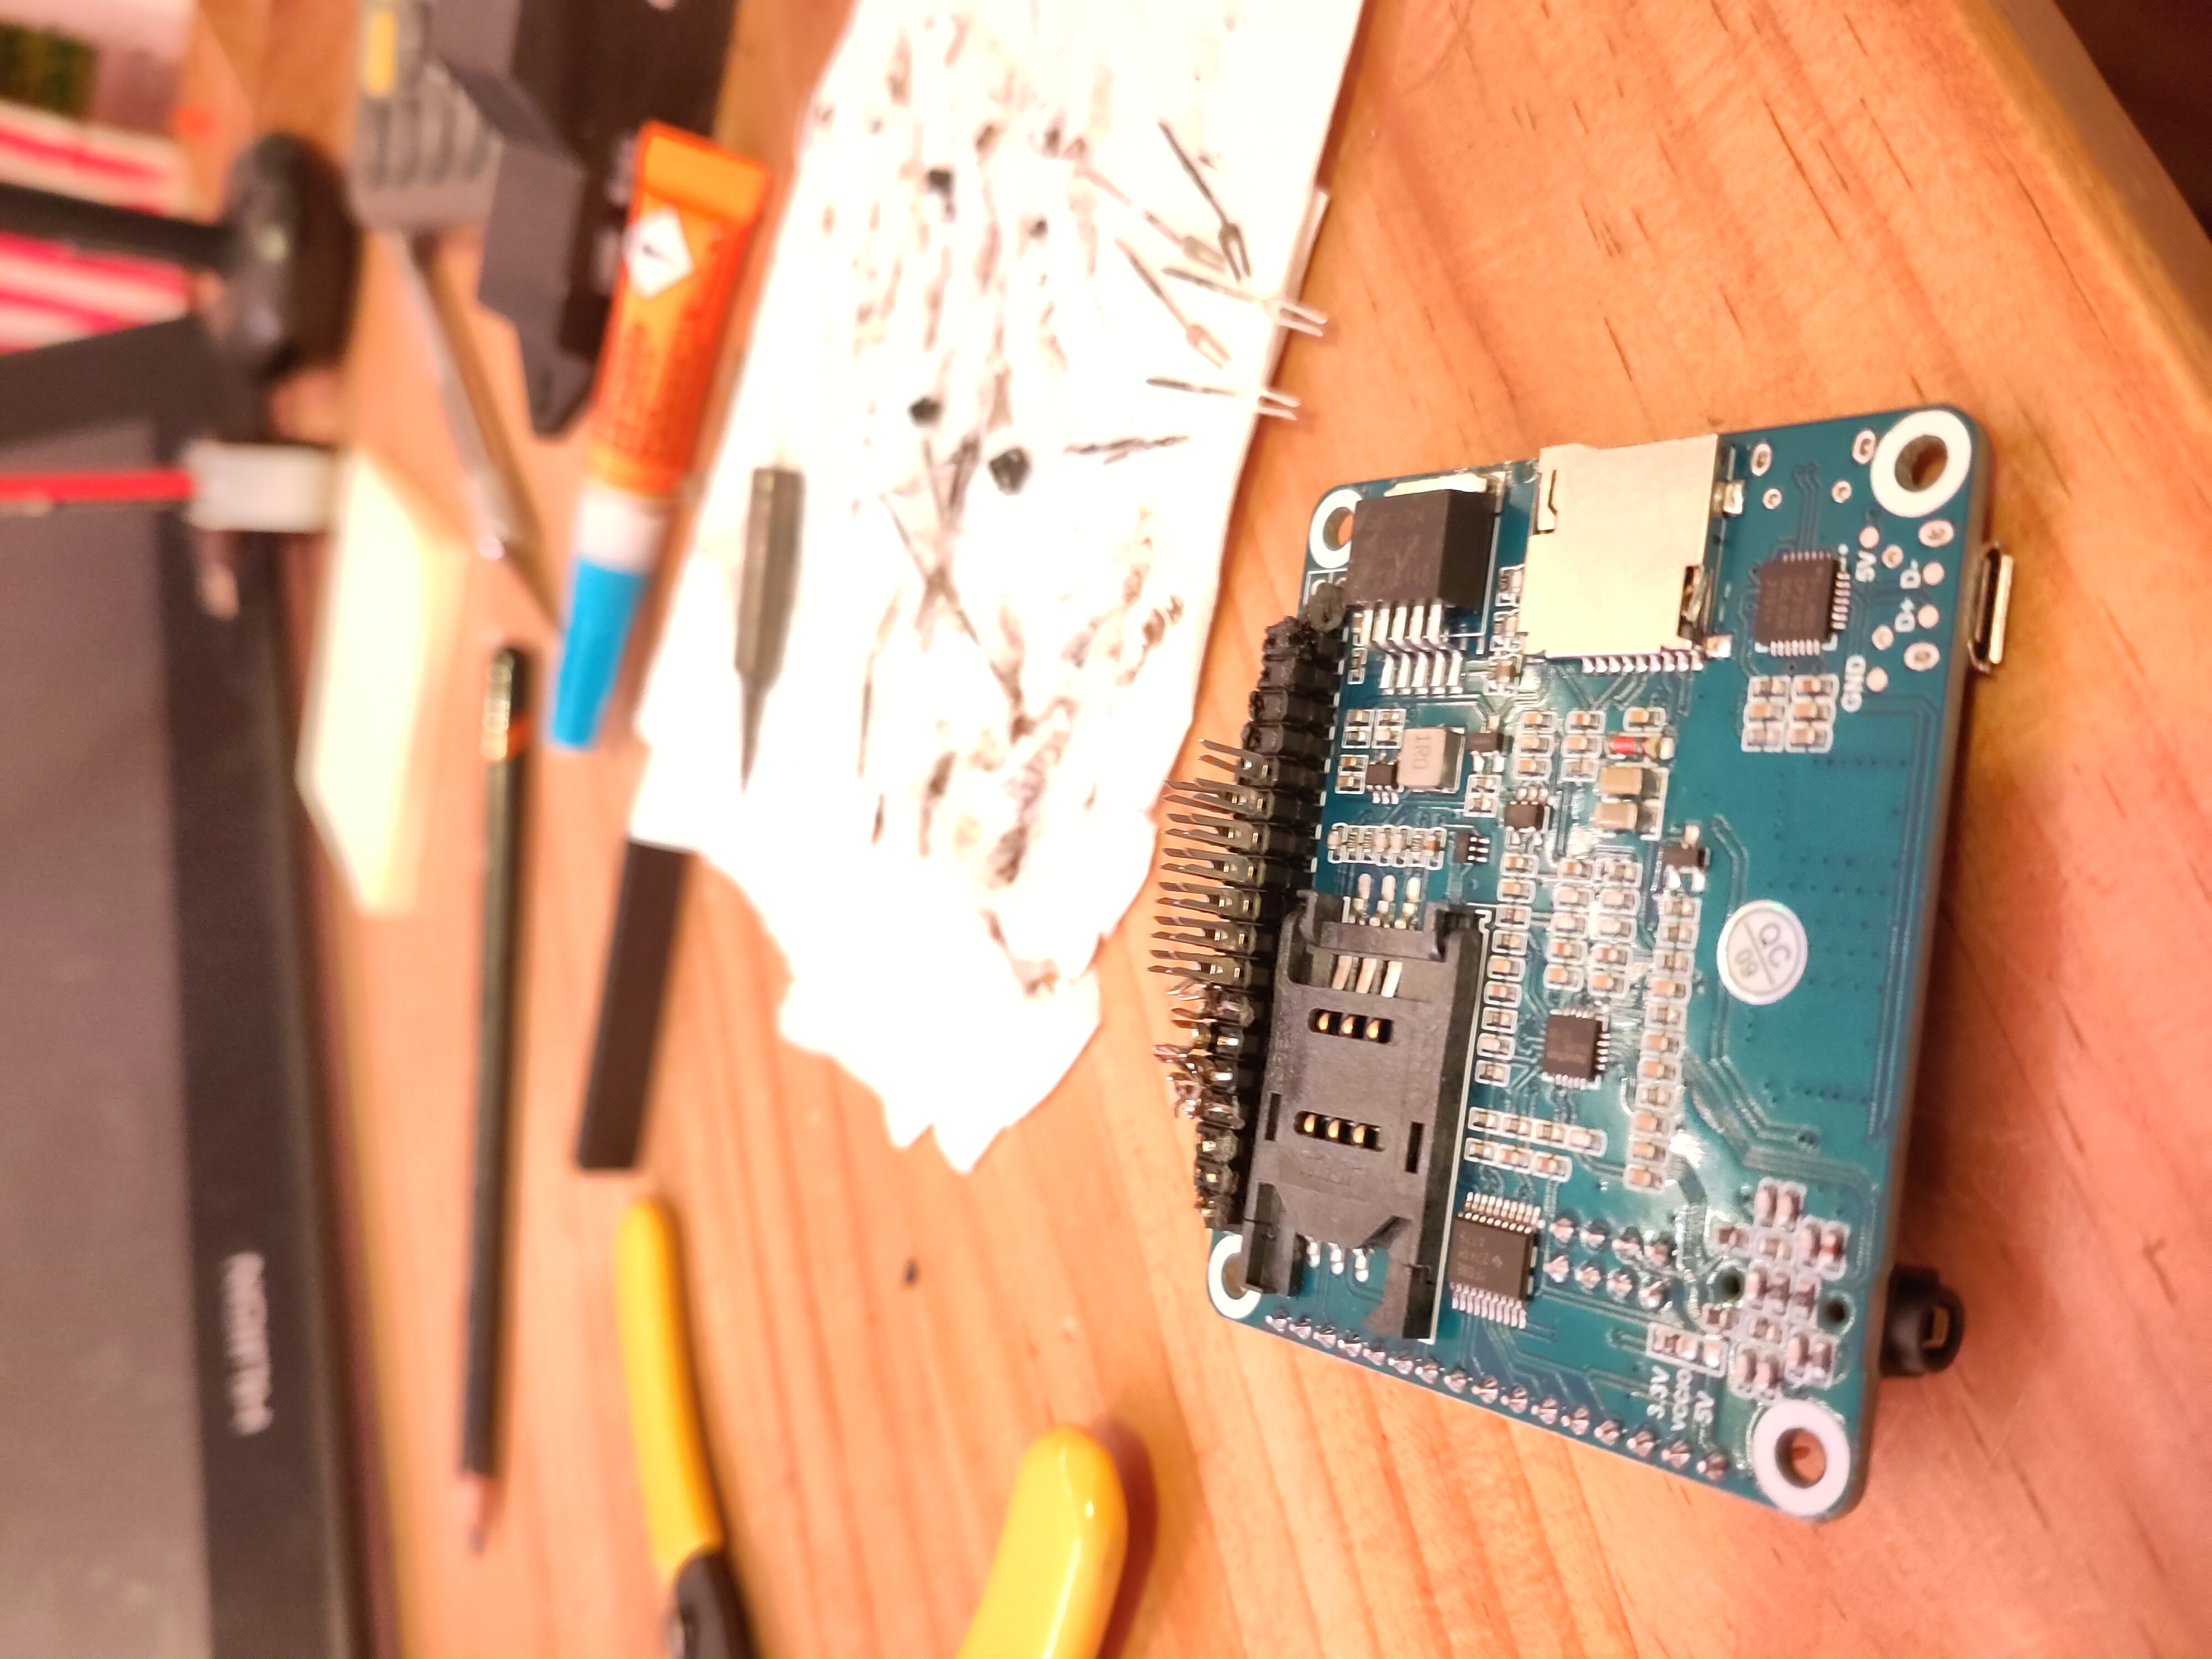
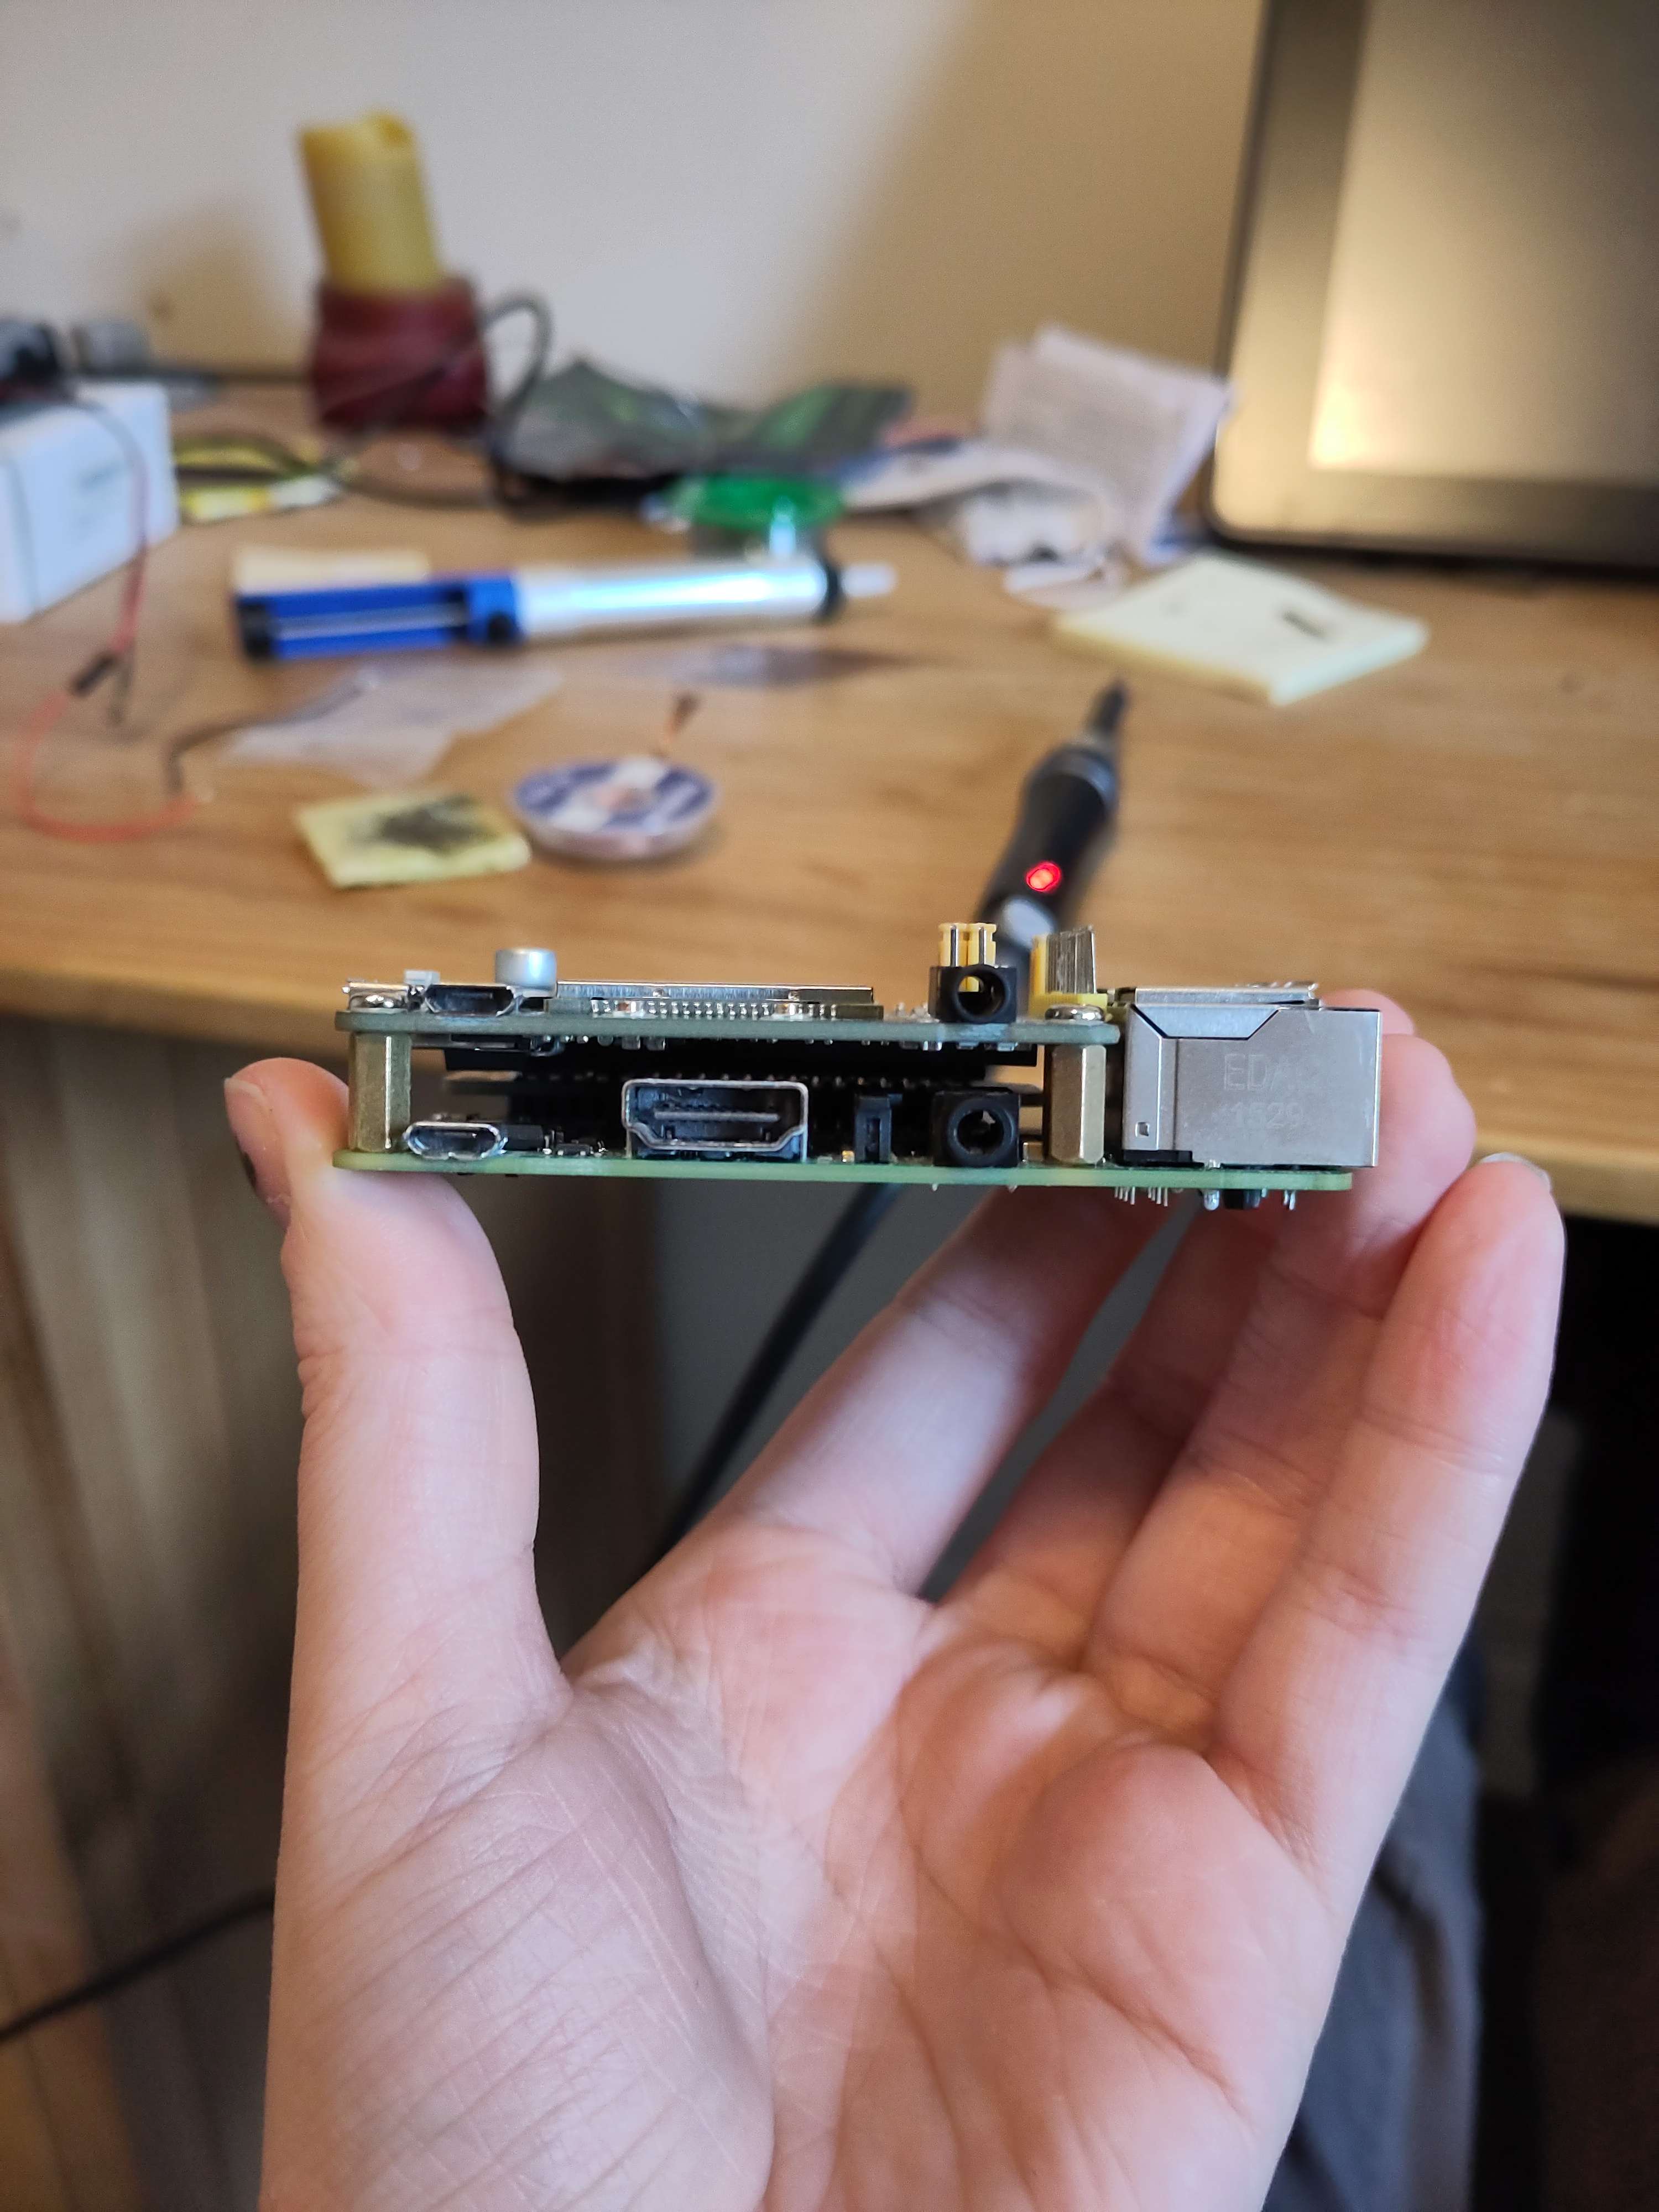
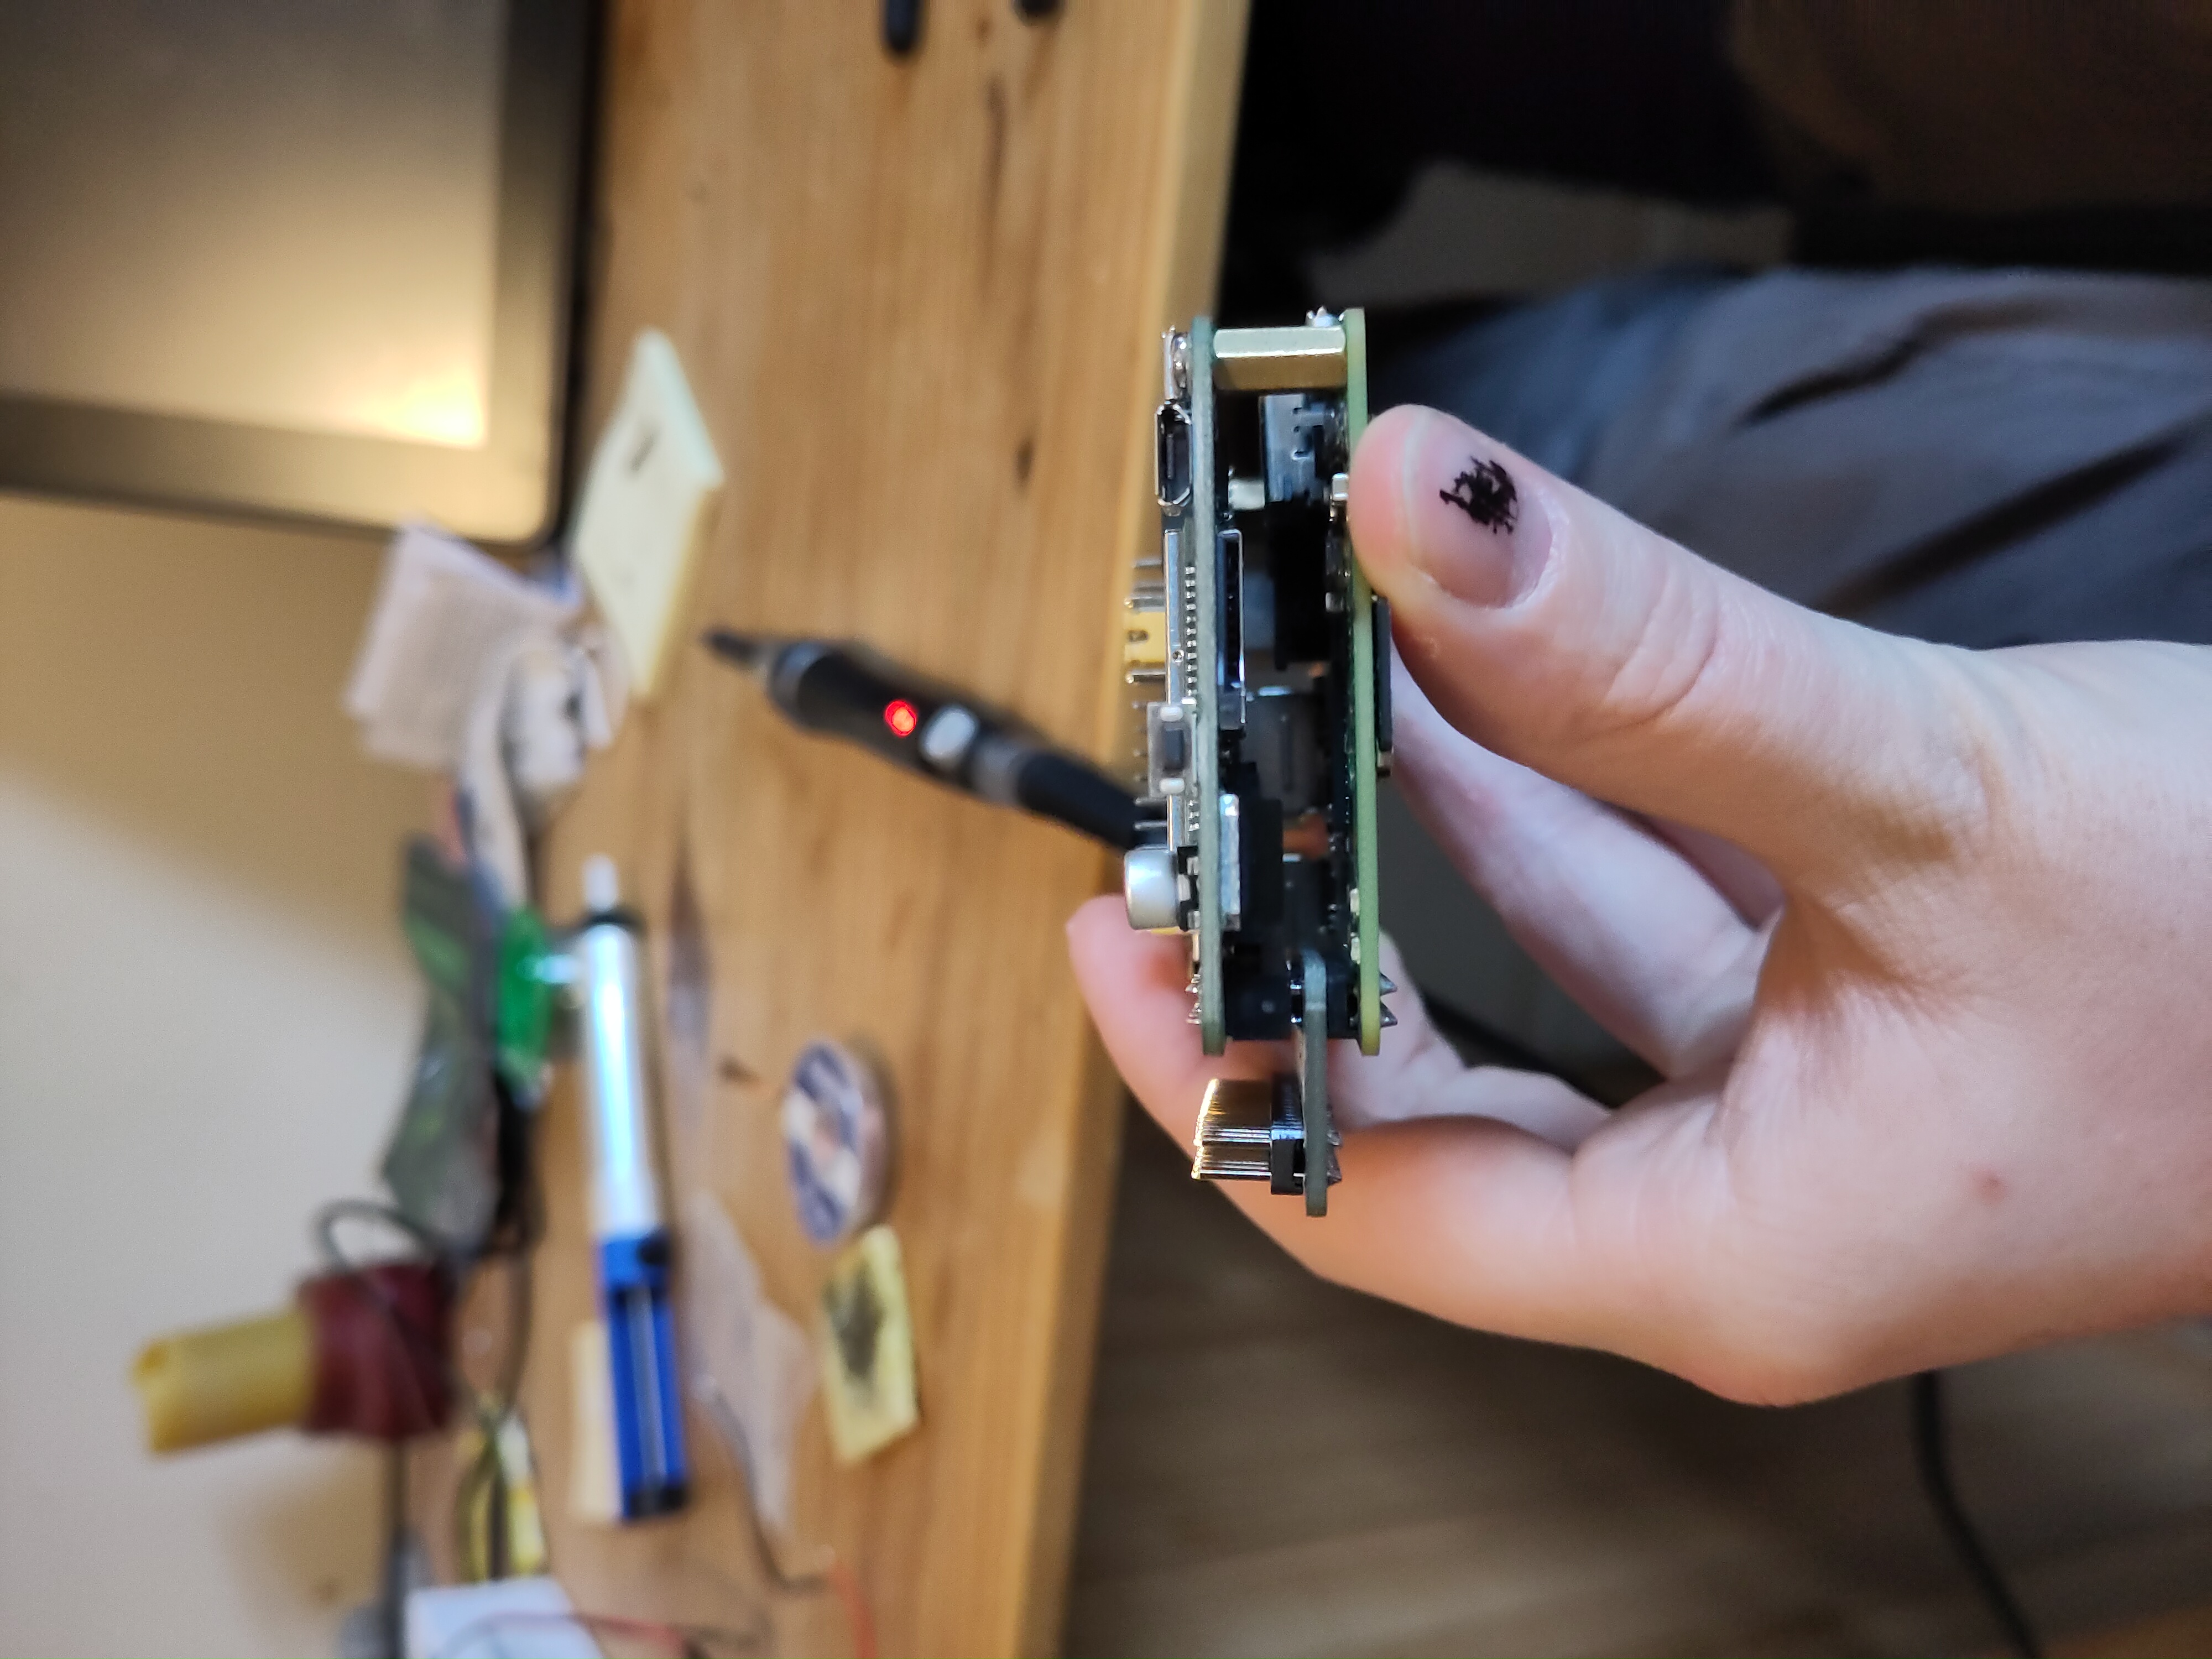
In my previous update there's some CAD images, you may notice an odd design choice in these. The smaller system has a board sticking out the top. This was done because the pi and hat combined together are quite tall and a thicker device would be somewhat ugly and unwieldy. Having them stick out the top was an attempt to create a smaller device but I wasn't very happy with this. As a solution, this put the board at risk of damage and essentially worsened the ruggedness of the device just for improved aesthetics. In order to fix this I decided to resolder the header pins on my boards myself to try make them smaller.
This involved cutting the plastic from the header, de-soldering each of the 40 pins individually and then either re-soldering them directly onto the pi or finding some form of smaller header. I didn't want to directly solder them to the board as it would have been a bit too permanent (the idea of being able to disassemble this board if necessary is something I'm somewhat attached to). For a while I really struggled to find a header that was much smaller but eventually I found an interesting workaround. I found a header extender board that turned an RPi's GPIO pins into a set of two. Using this I could then attach the hat using a shallow female header and still have access to the GPIO, essentially making the device slightly wider instead of taller.
I bought the board and headers and after soldering them on I was left with a device that was a third or so smaller than it had originally been! I was really paranoid I was going to damage my board from this but it worked out so I'm quite proud of it.
Progress Update 15/3/2024 - Apline Linux... Again!
All of my hardware is ready, so I started working on the software, doing this I realised my Pi was taking up more energy than I'd hoped. To fix this I switched to a lighter operating system. Alpine Linux supports Rpi arm chips and I'm familiar with it from making the server for this website. So I figured I'd give it a go.
Progress Update 29/4/2024 - Wood working and a broken psu
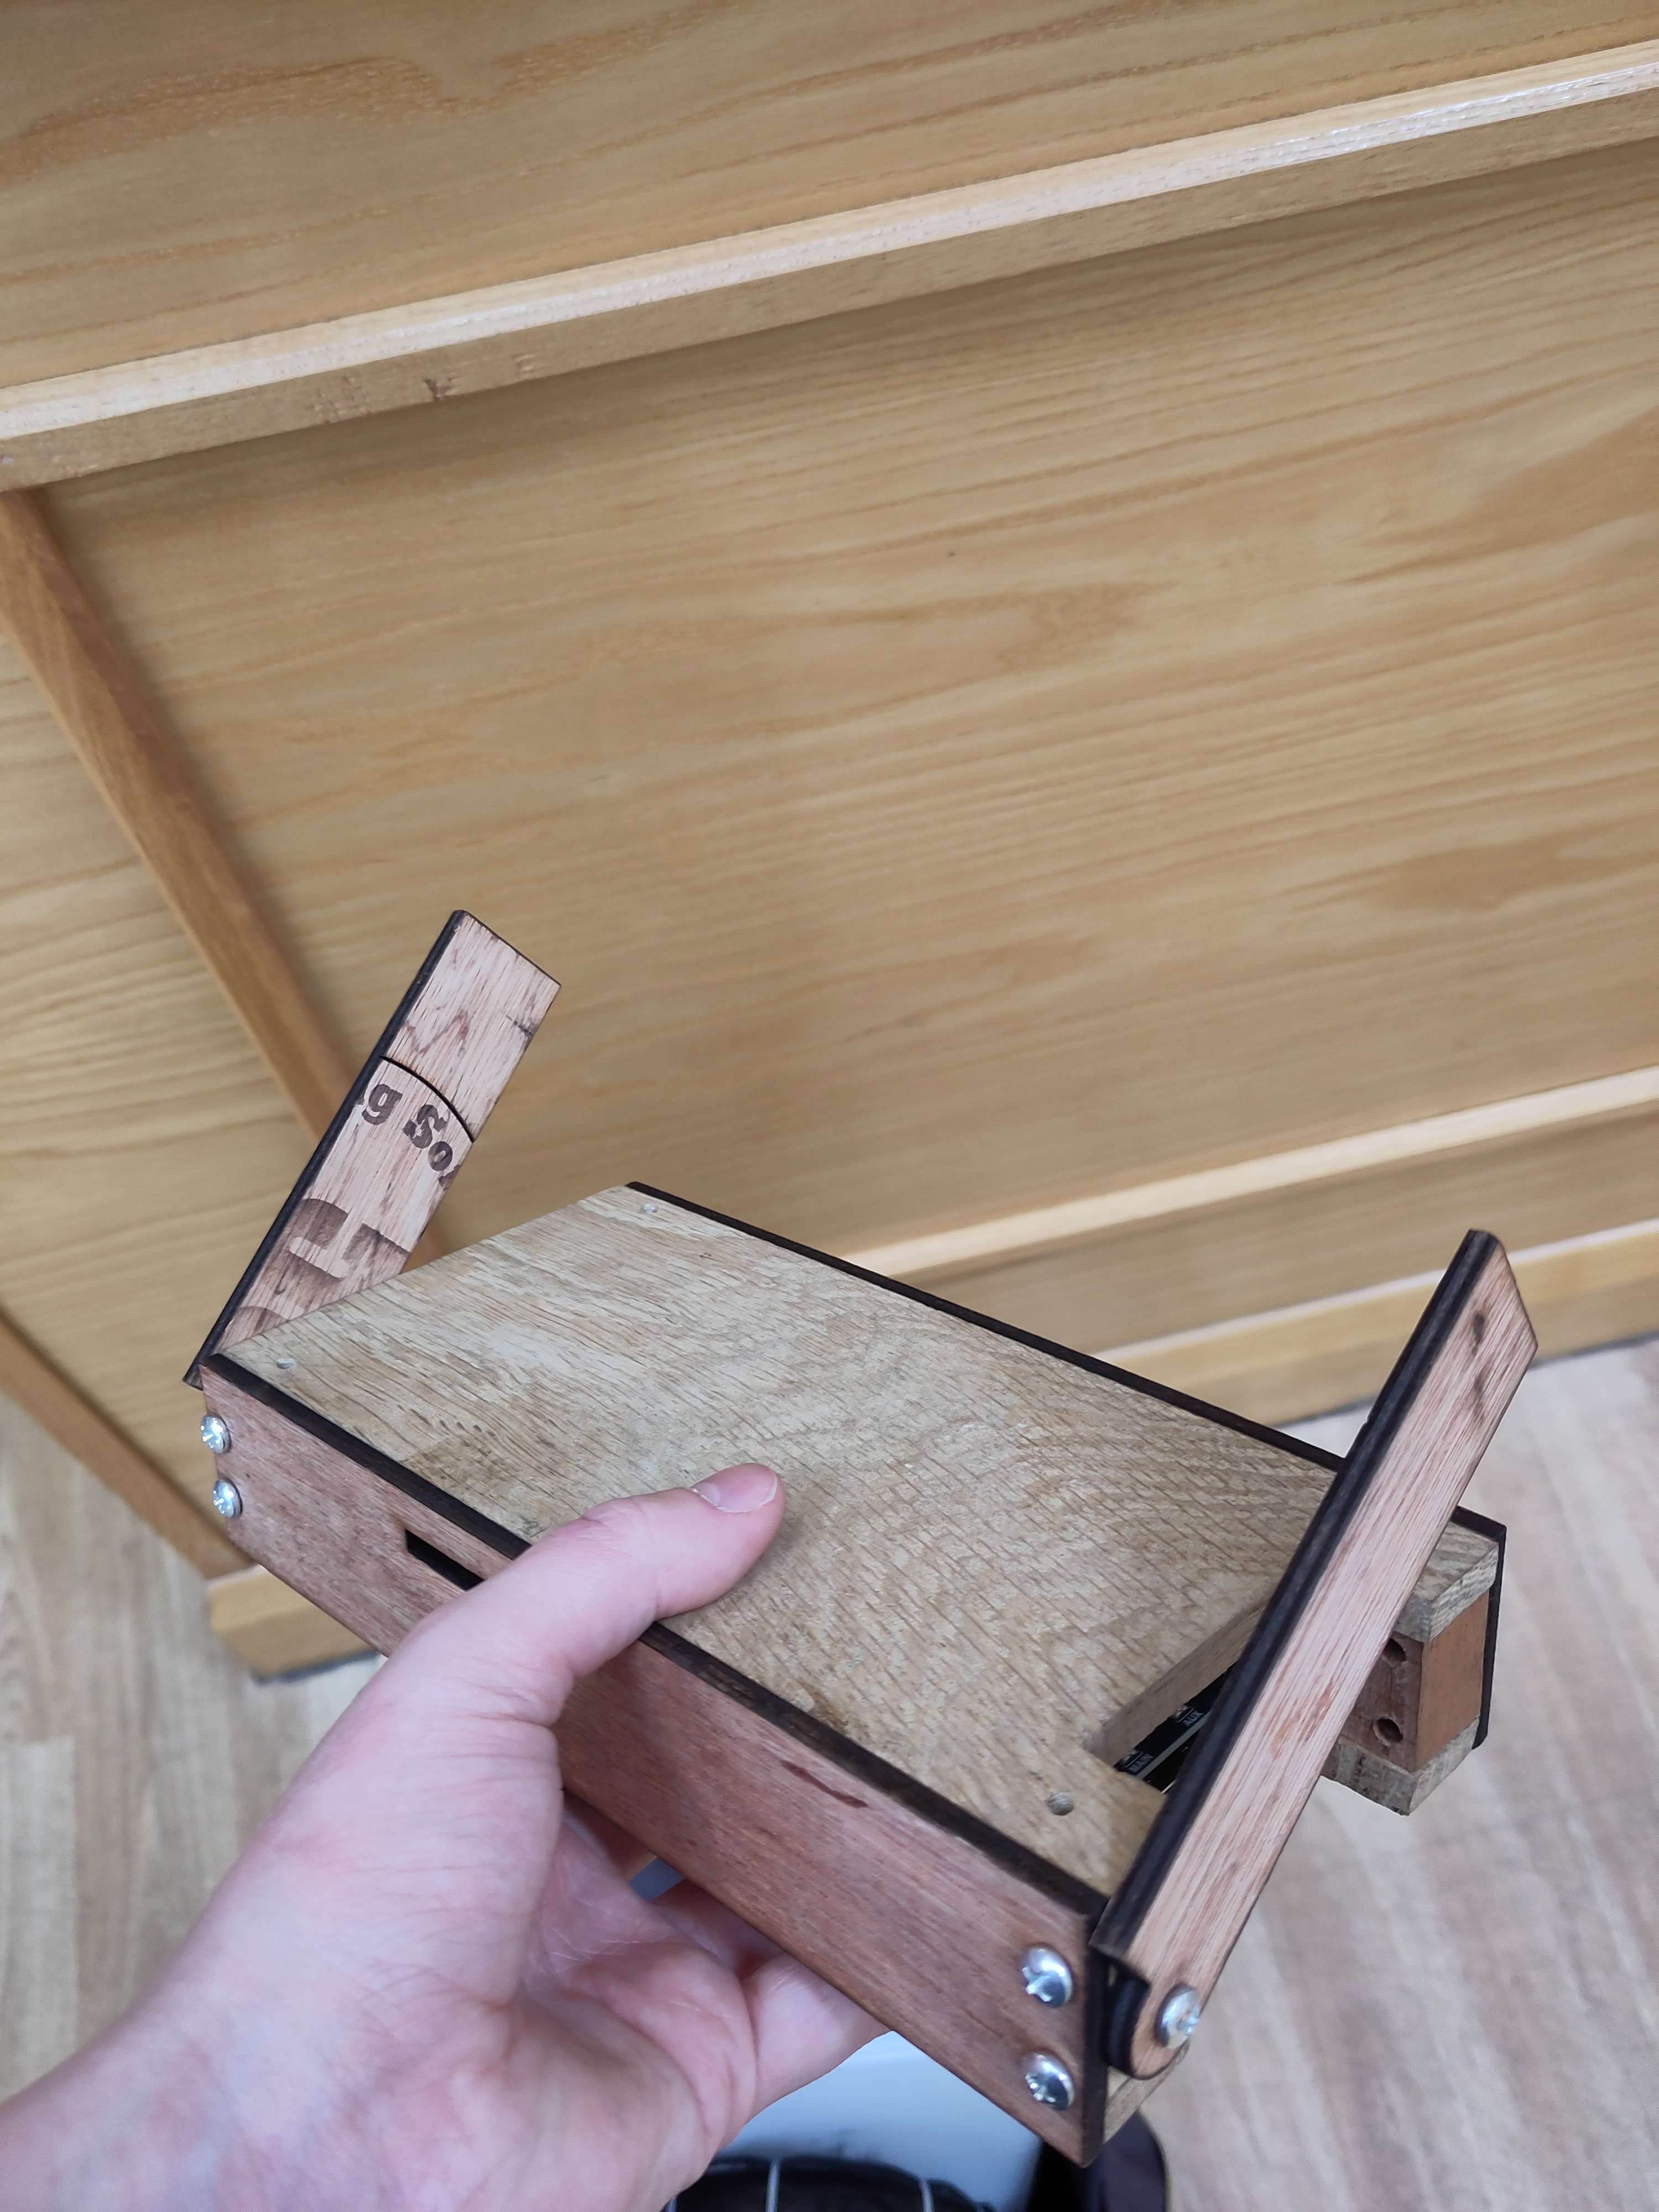
Over the Easter holidays, I met up with a friend and we started working on the wooden body of the device. We produced two rough base plates and started work milling corner blocks. We got half of these blocks done before I head to head back to uni. The amazing workshop engineers at the university were willing to finish off the last two blocks for me, which I drilled holes into and added threaded inserts to, resulting in this.
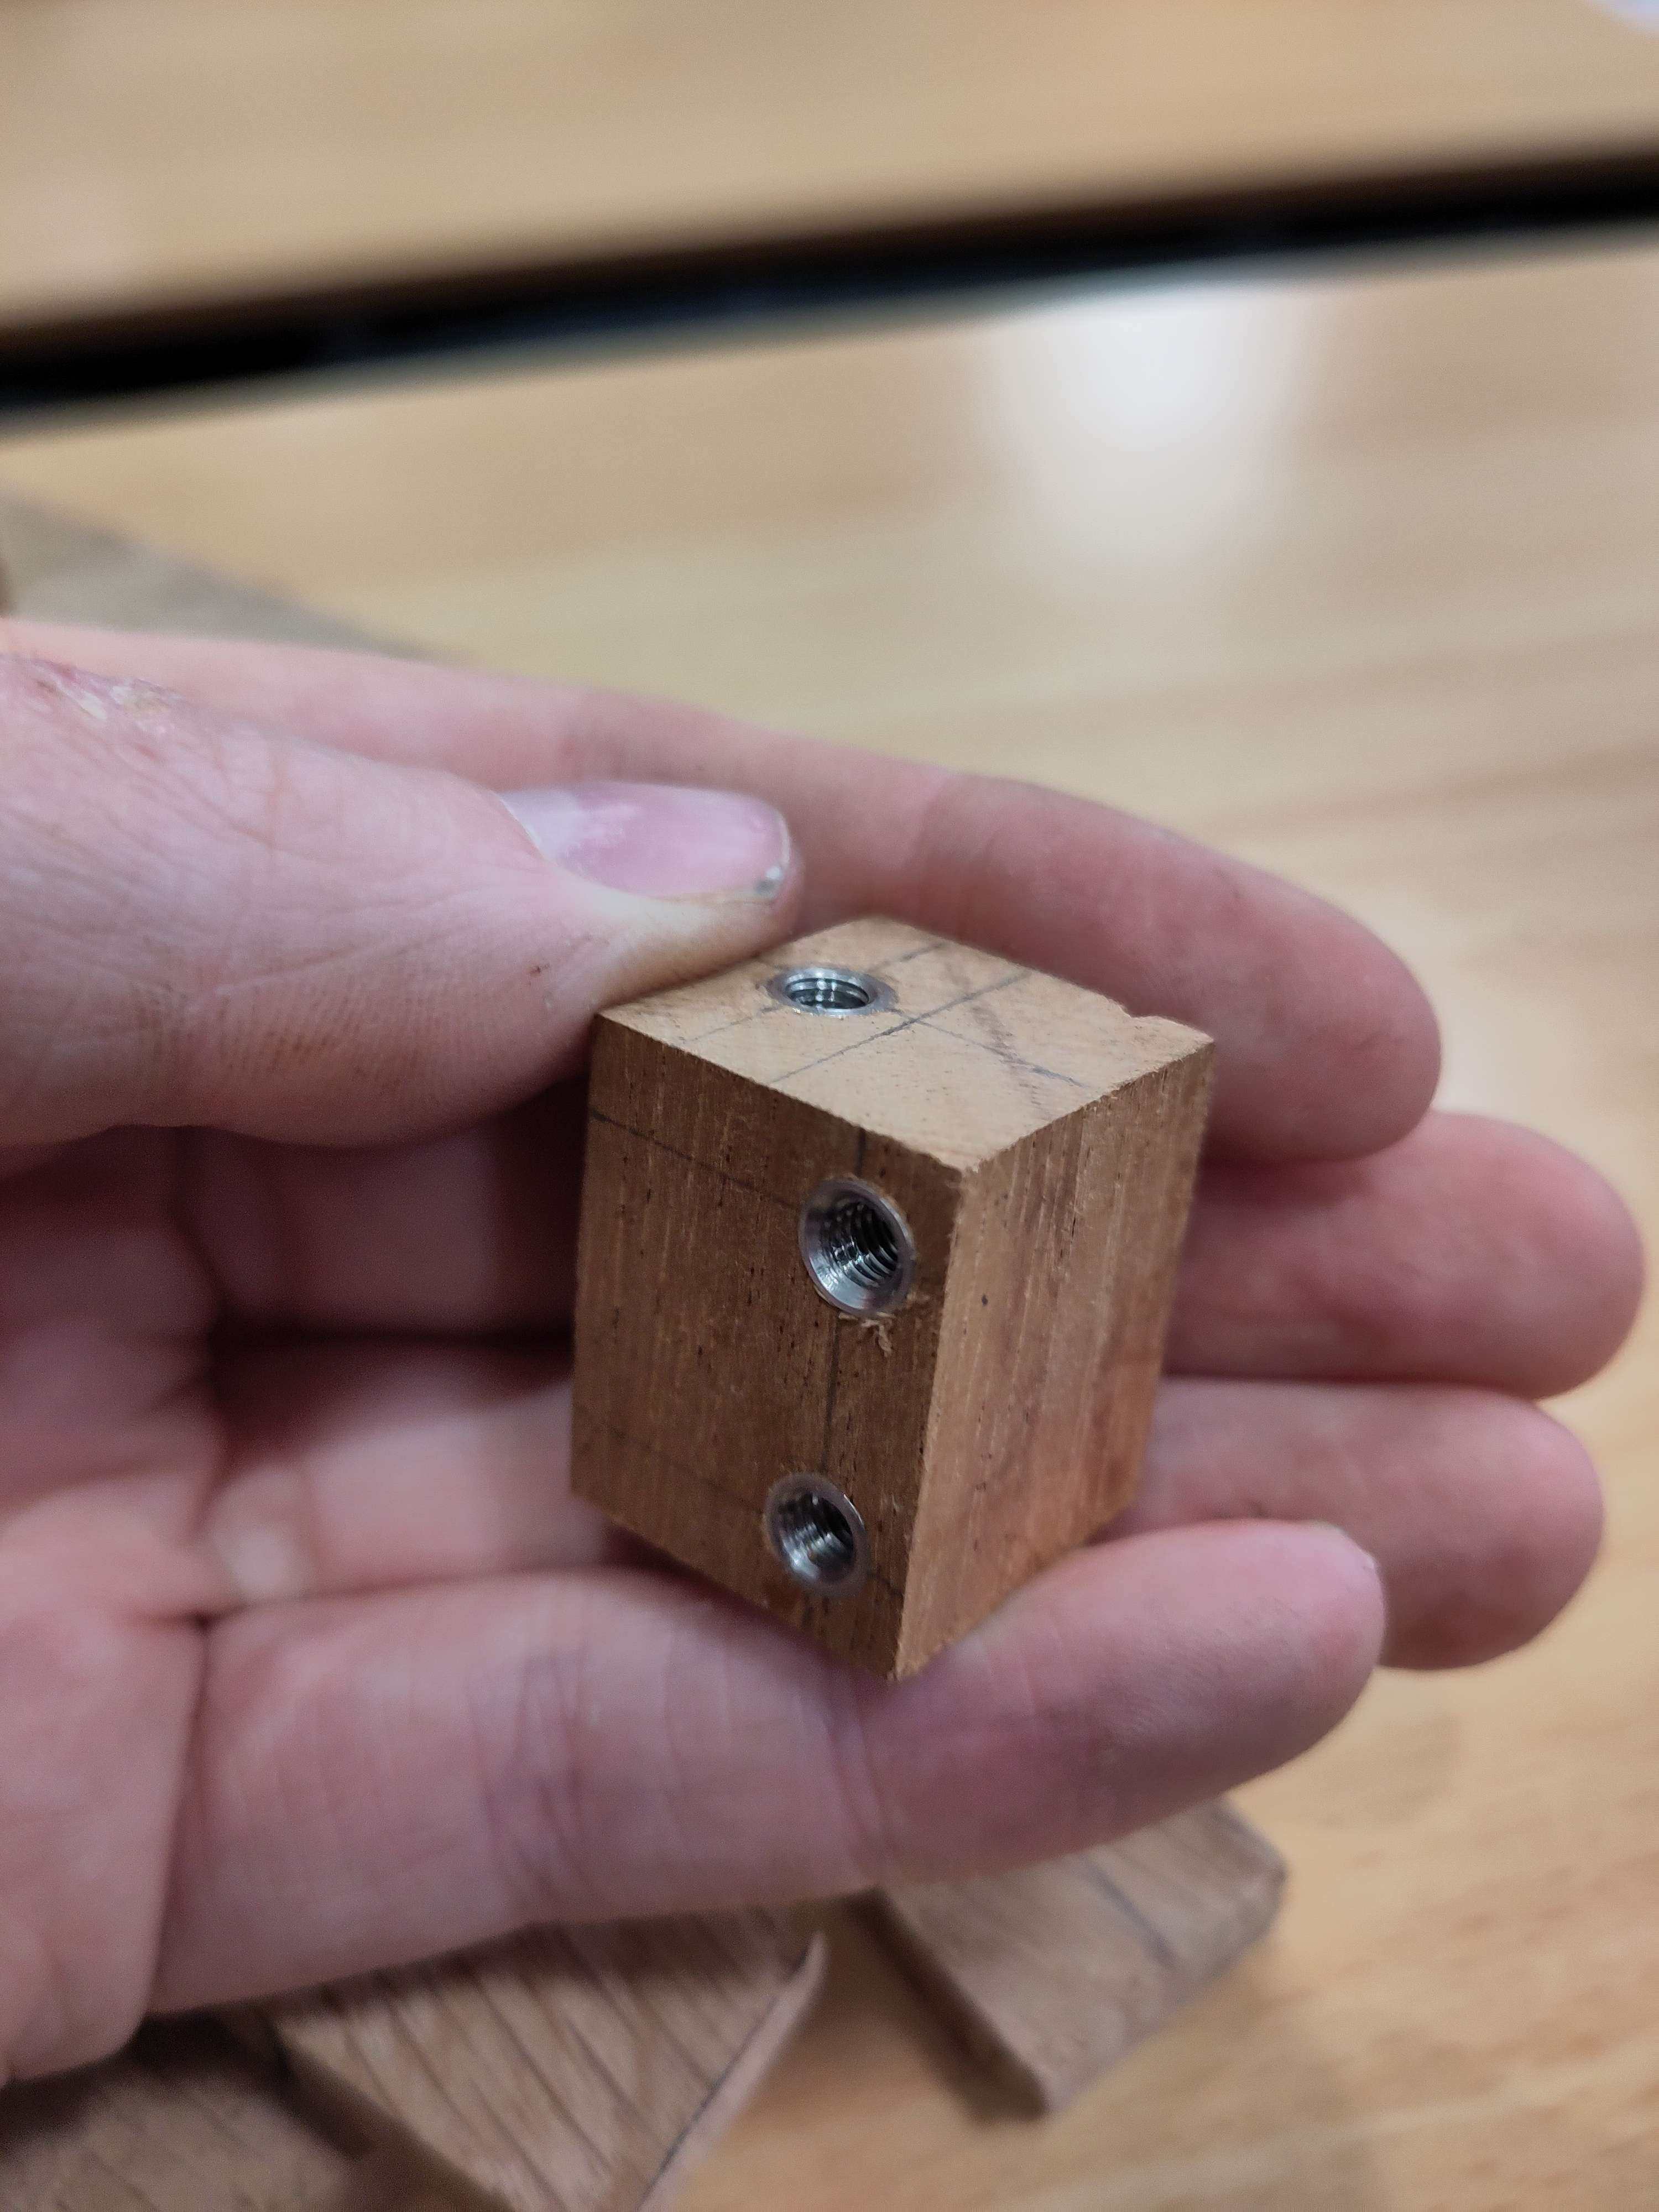
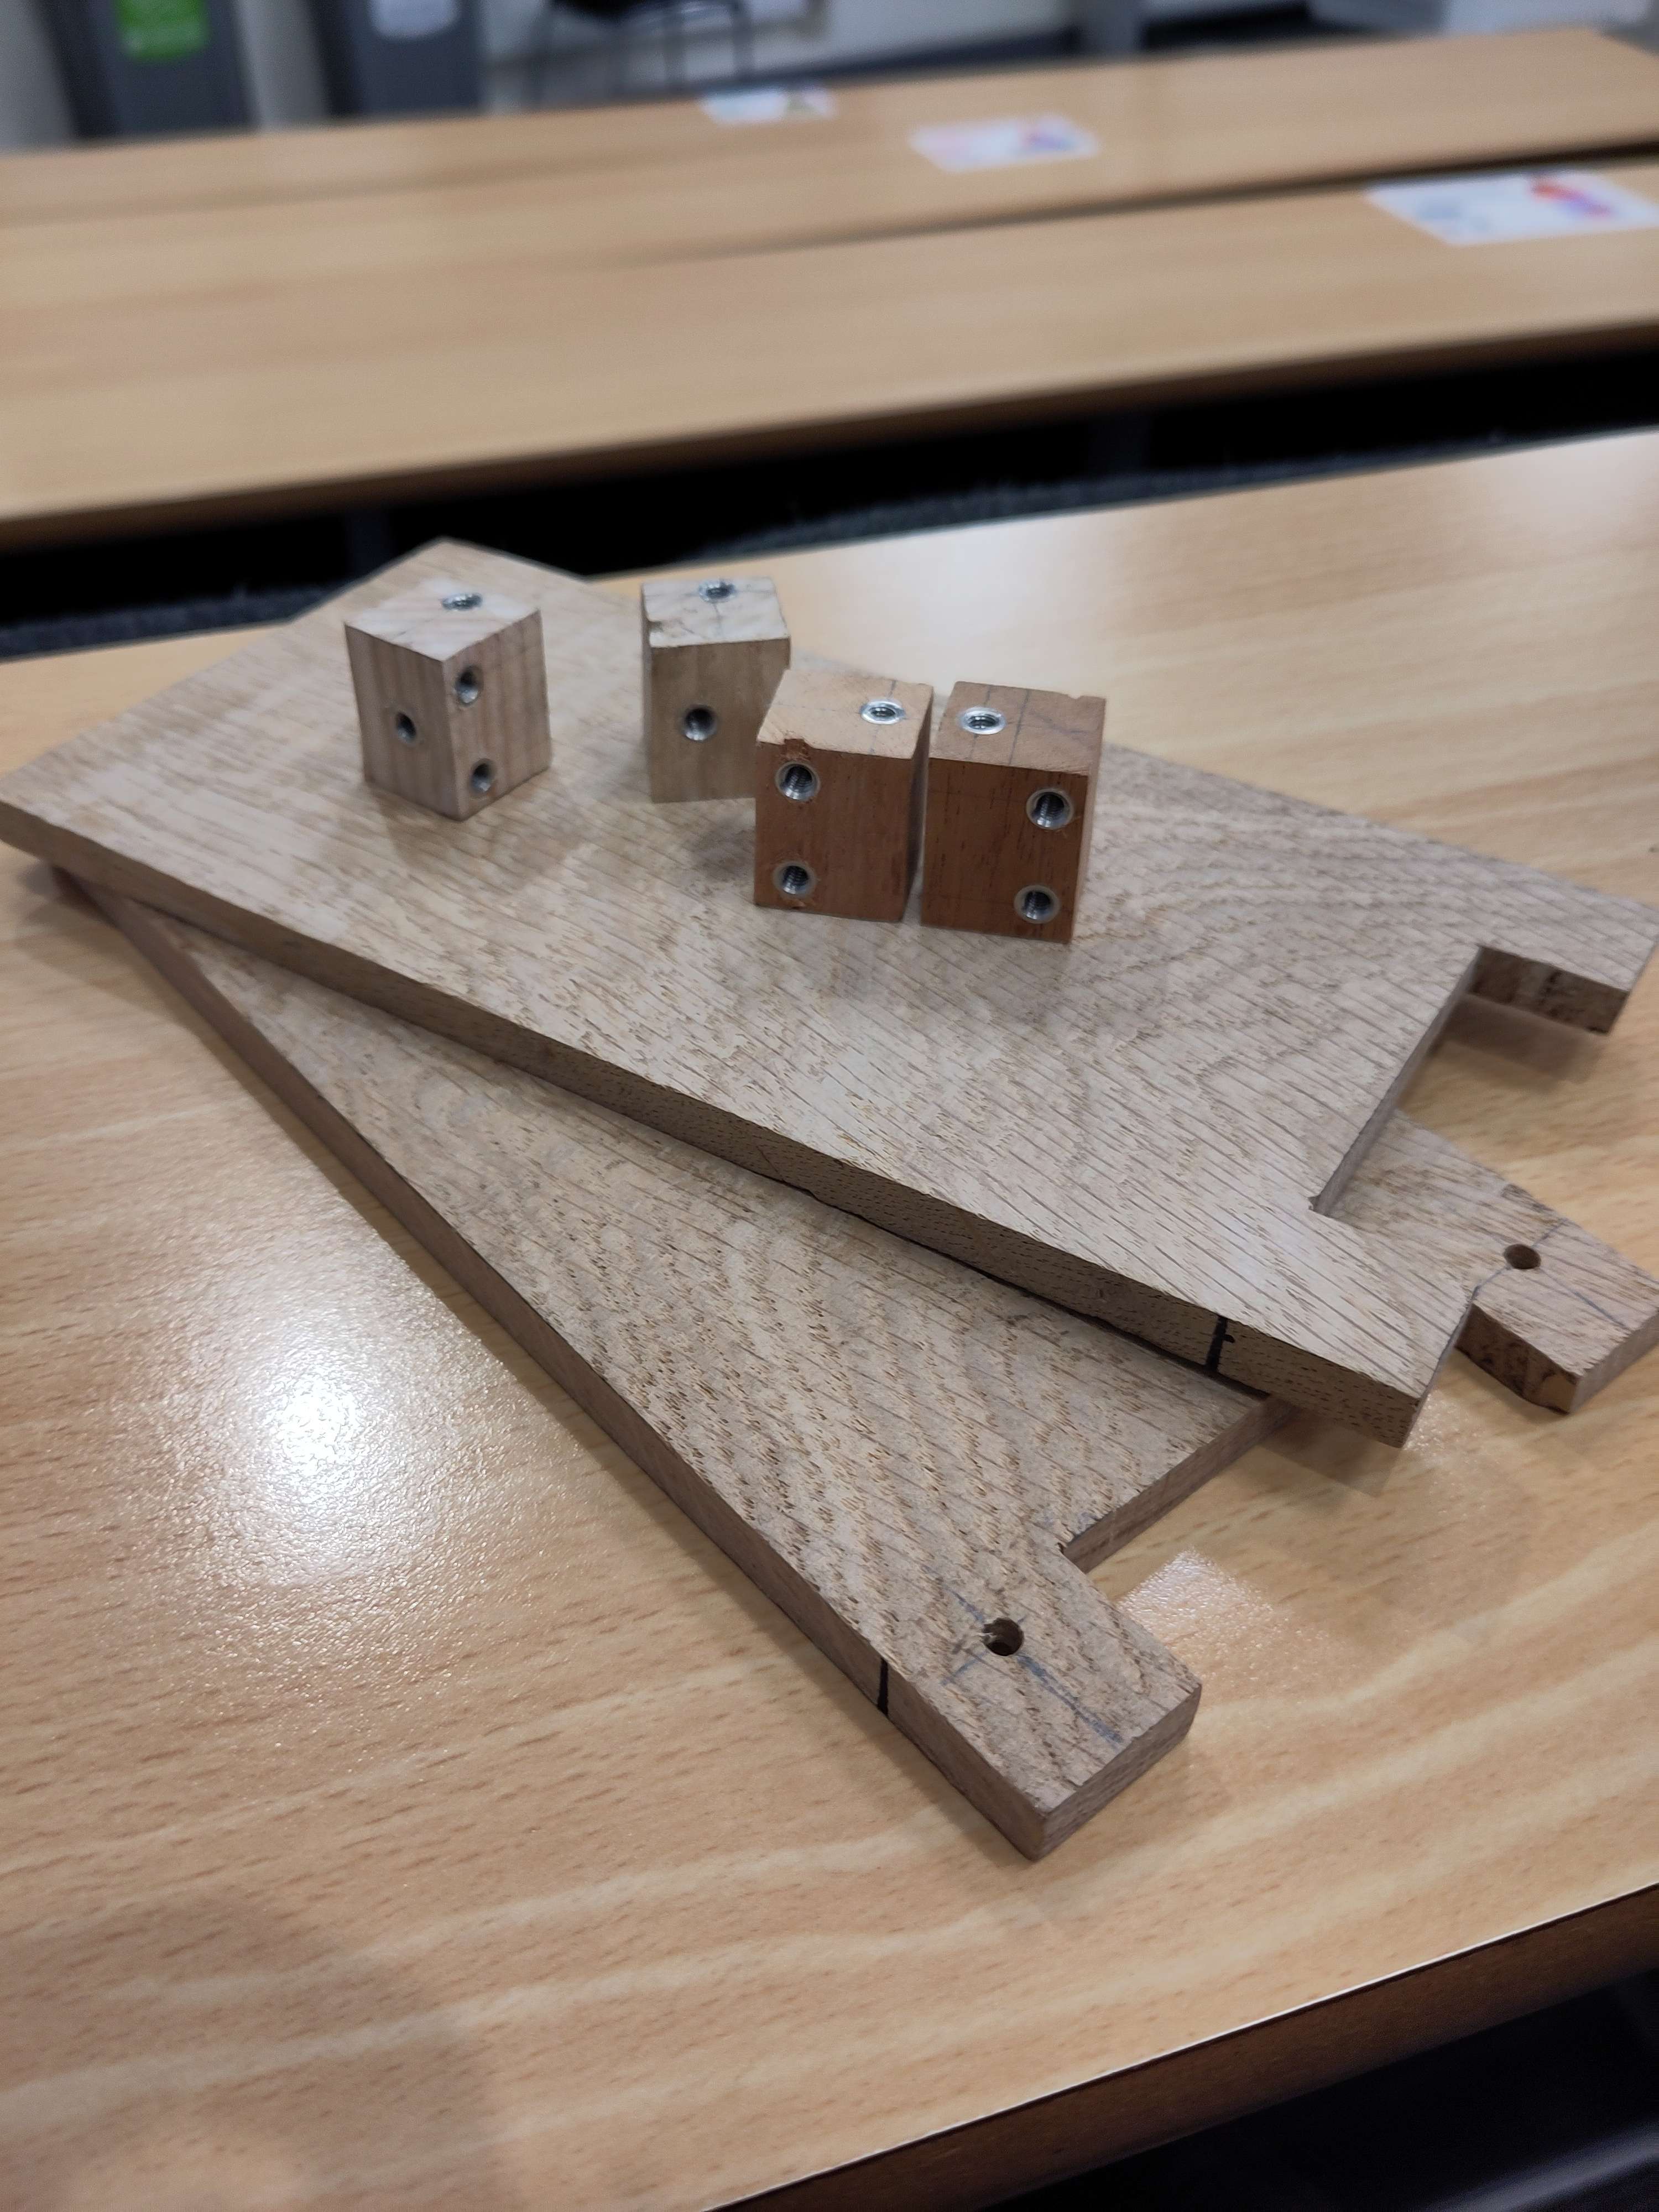
This is far from done, but its enough to build a basic frame I can use, I want to take something to emf camp, so I might try build it with just this for now.
As a side note, during this time I also worked on the software a bit. Doing this I ended up plugging in the pi to both the battery pack and mains, this lead to the pi charging the battery pack in reverse and popping one of its components and possibly damaging another.
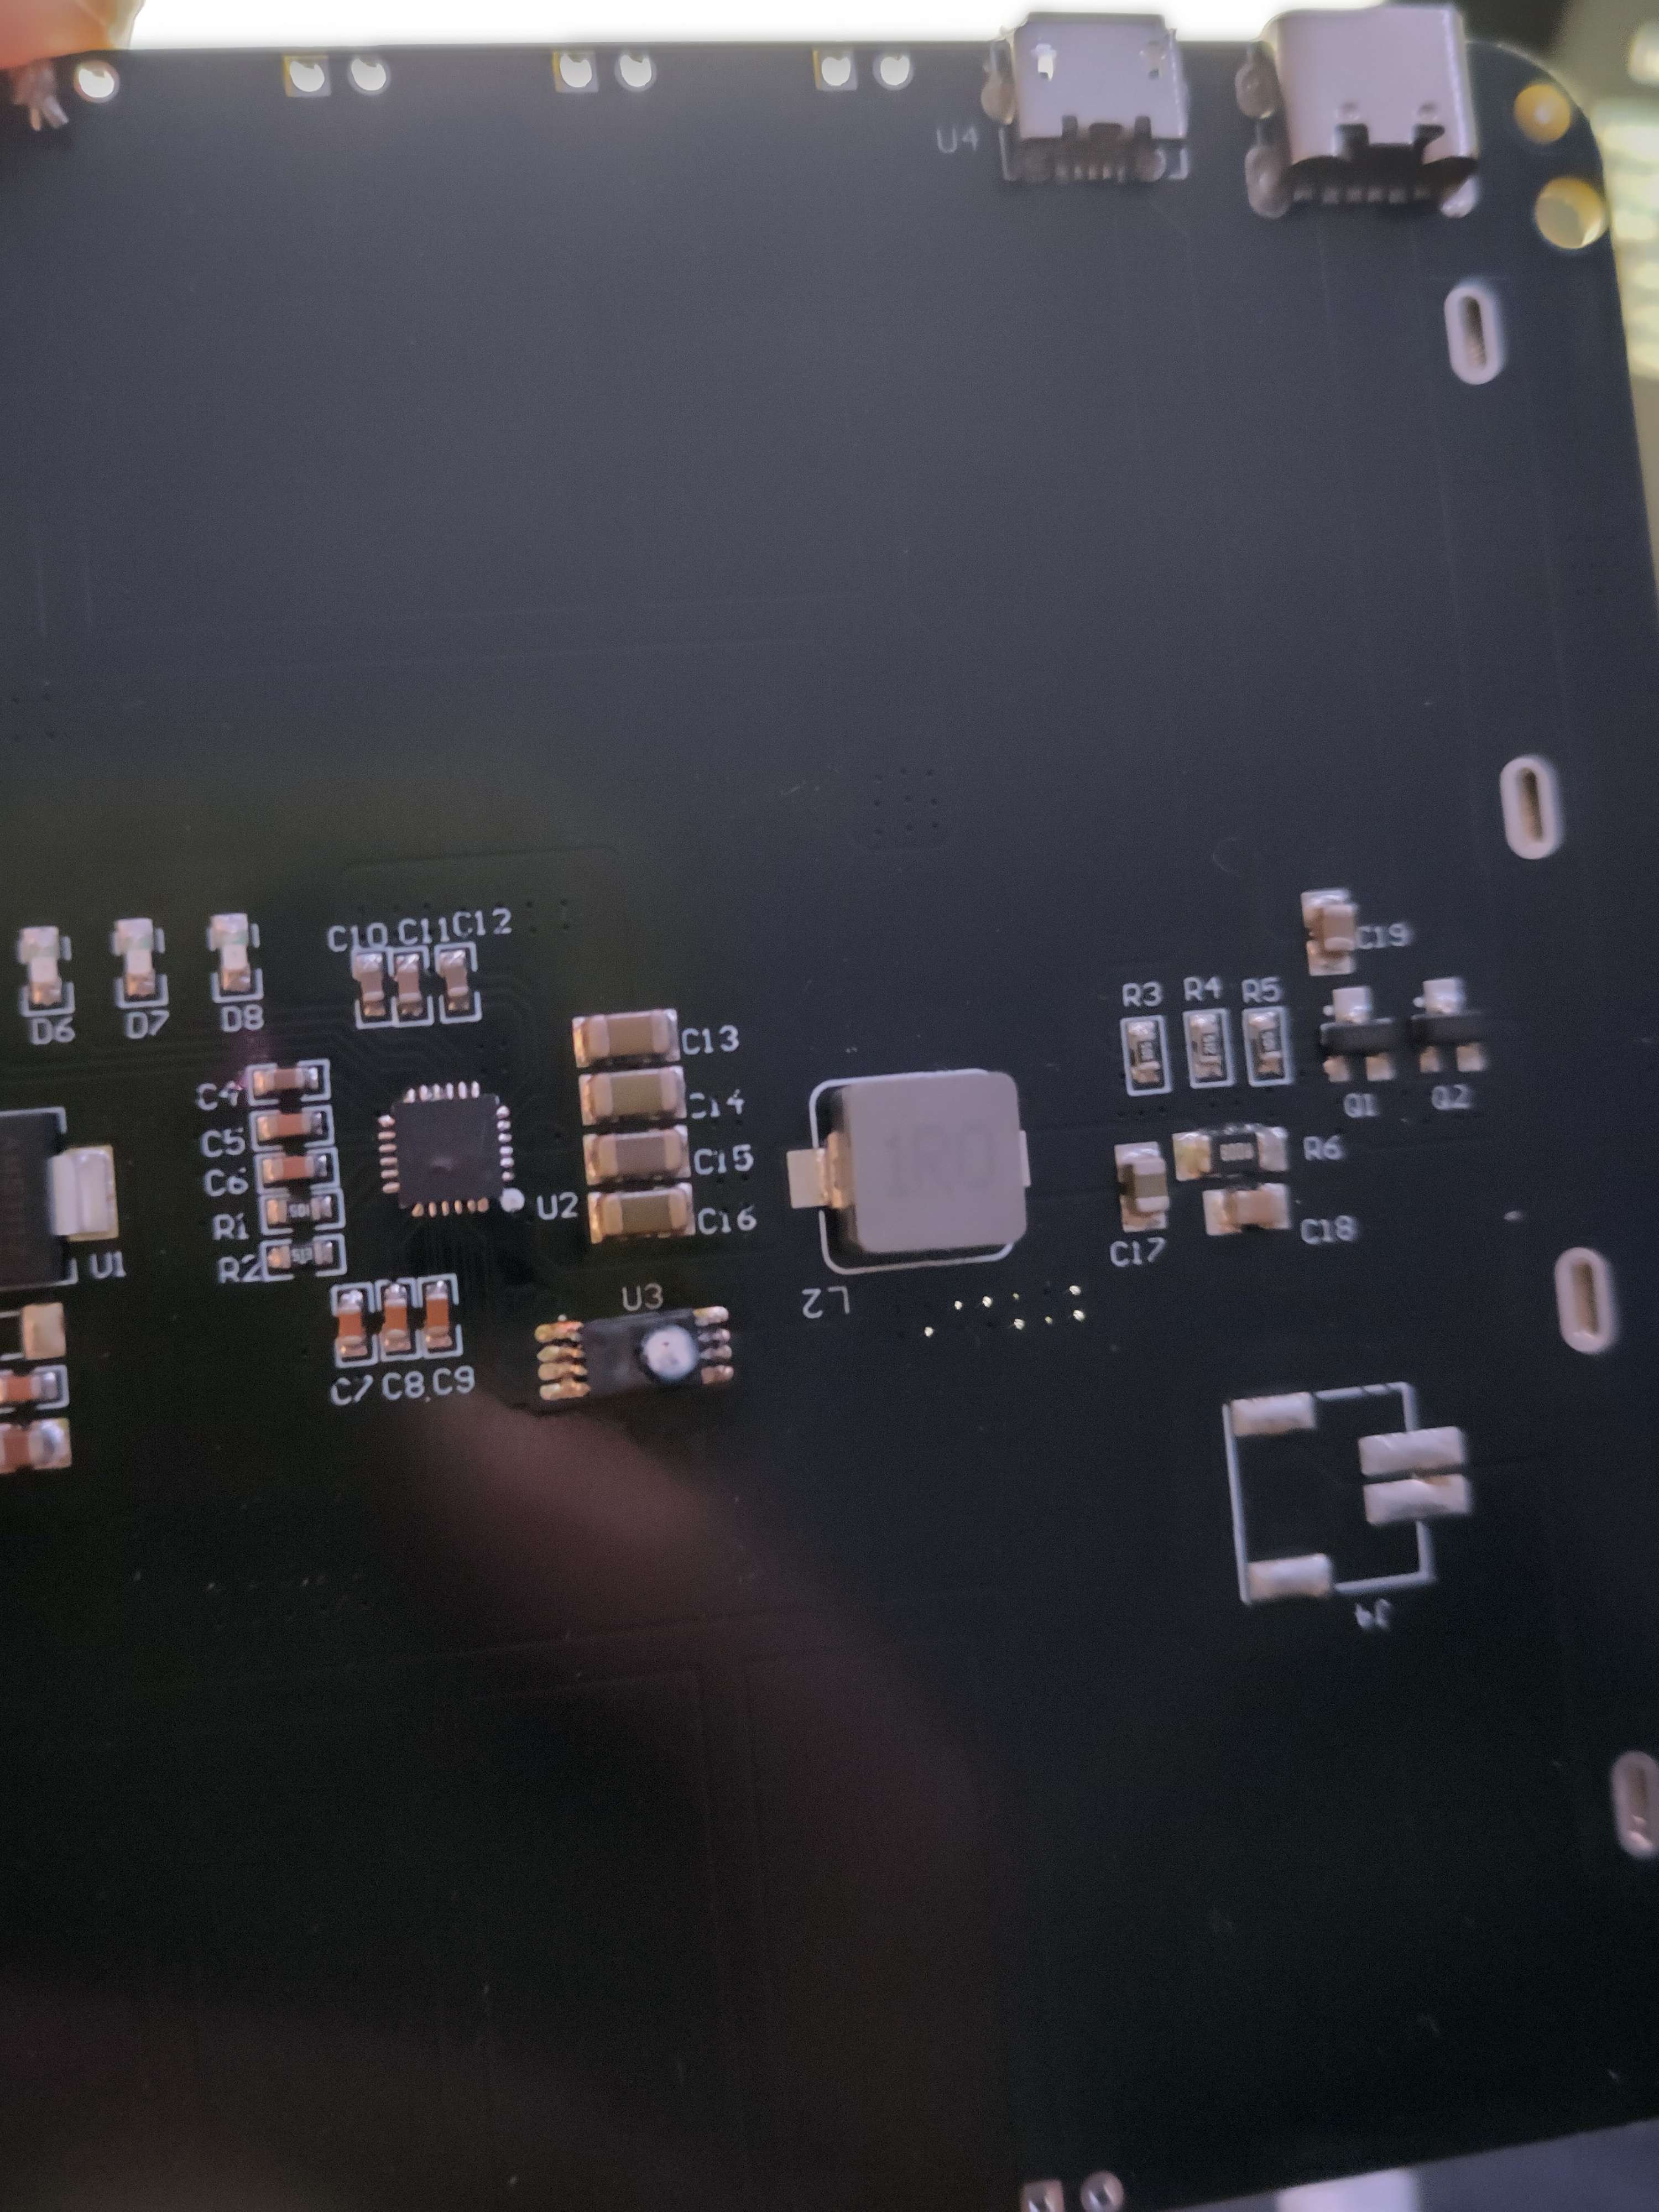
Luckily the manufacturer was really kind and gave me the names of the components I needed to replace. I ordered them from Ebay and one arrived quite quickly (the other I'm still waiting on). These were smd components and I'd never soldered anything other than through-hole before so I did some reasearch and found a great video by a channel called eleneasy which prepped me perfectly. I gave it a go on the first component that arrived and although it hasn't been tested yet, I'm quite happy with the result considering its my first time.
Progress Update 22/5/2024 - Board repair, board breaking, drivers and woodworking
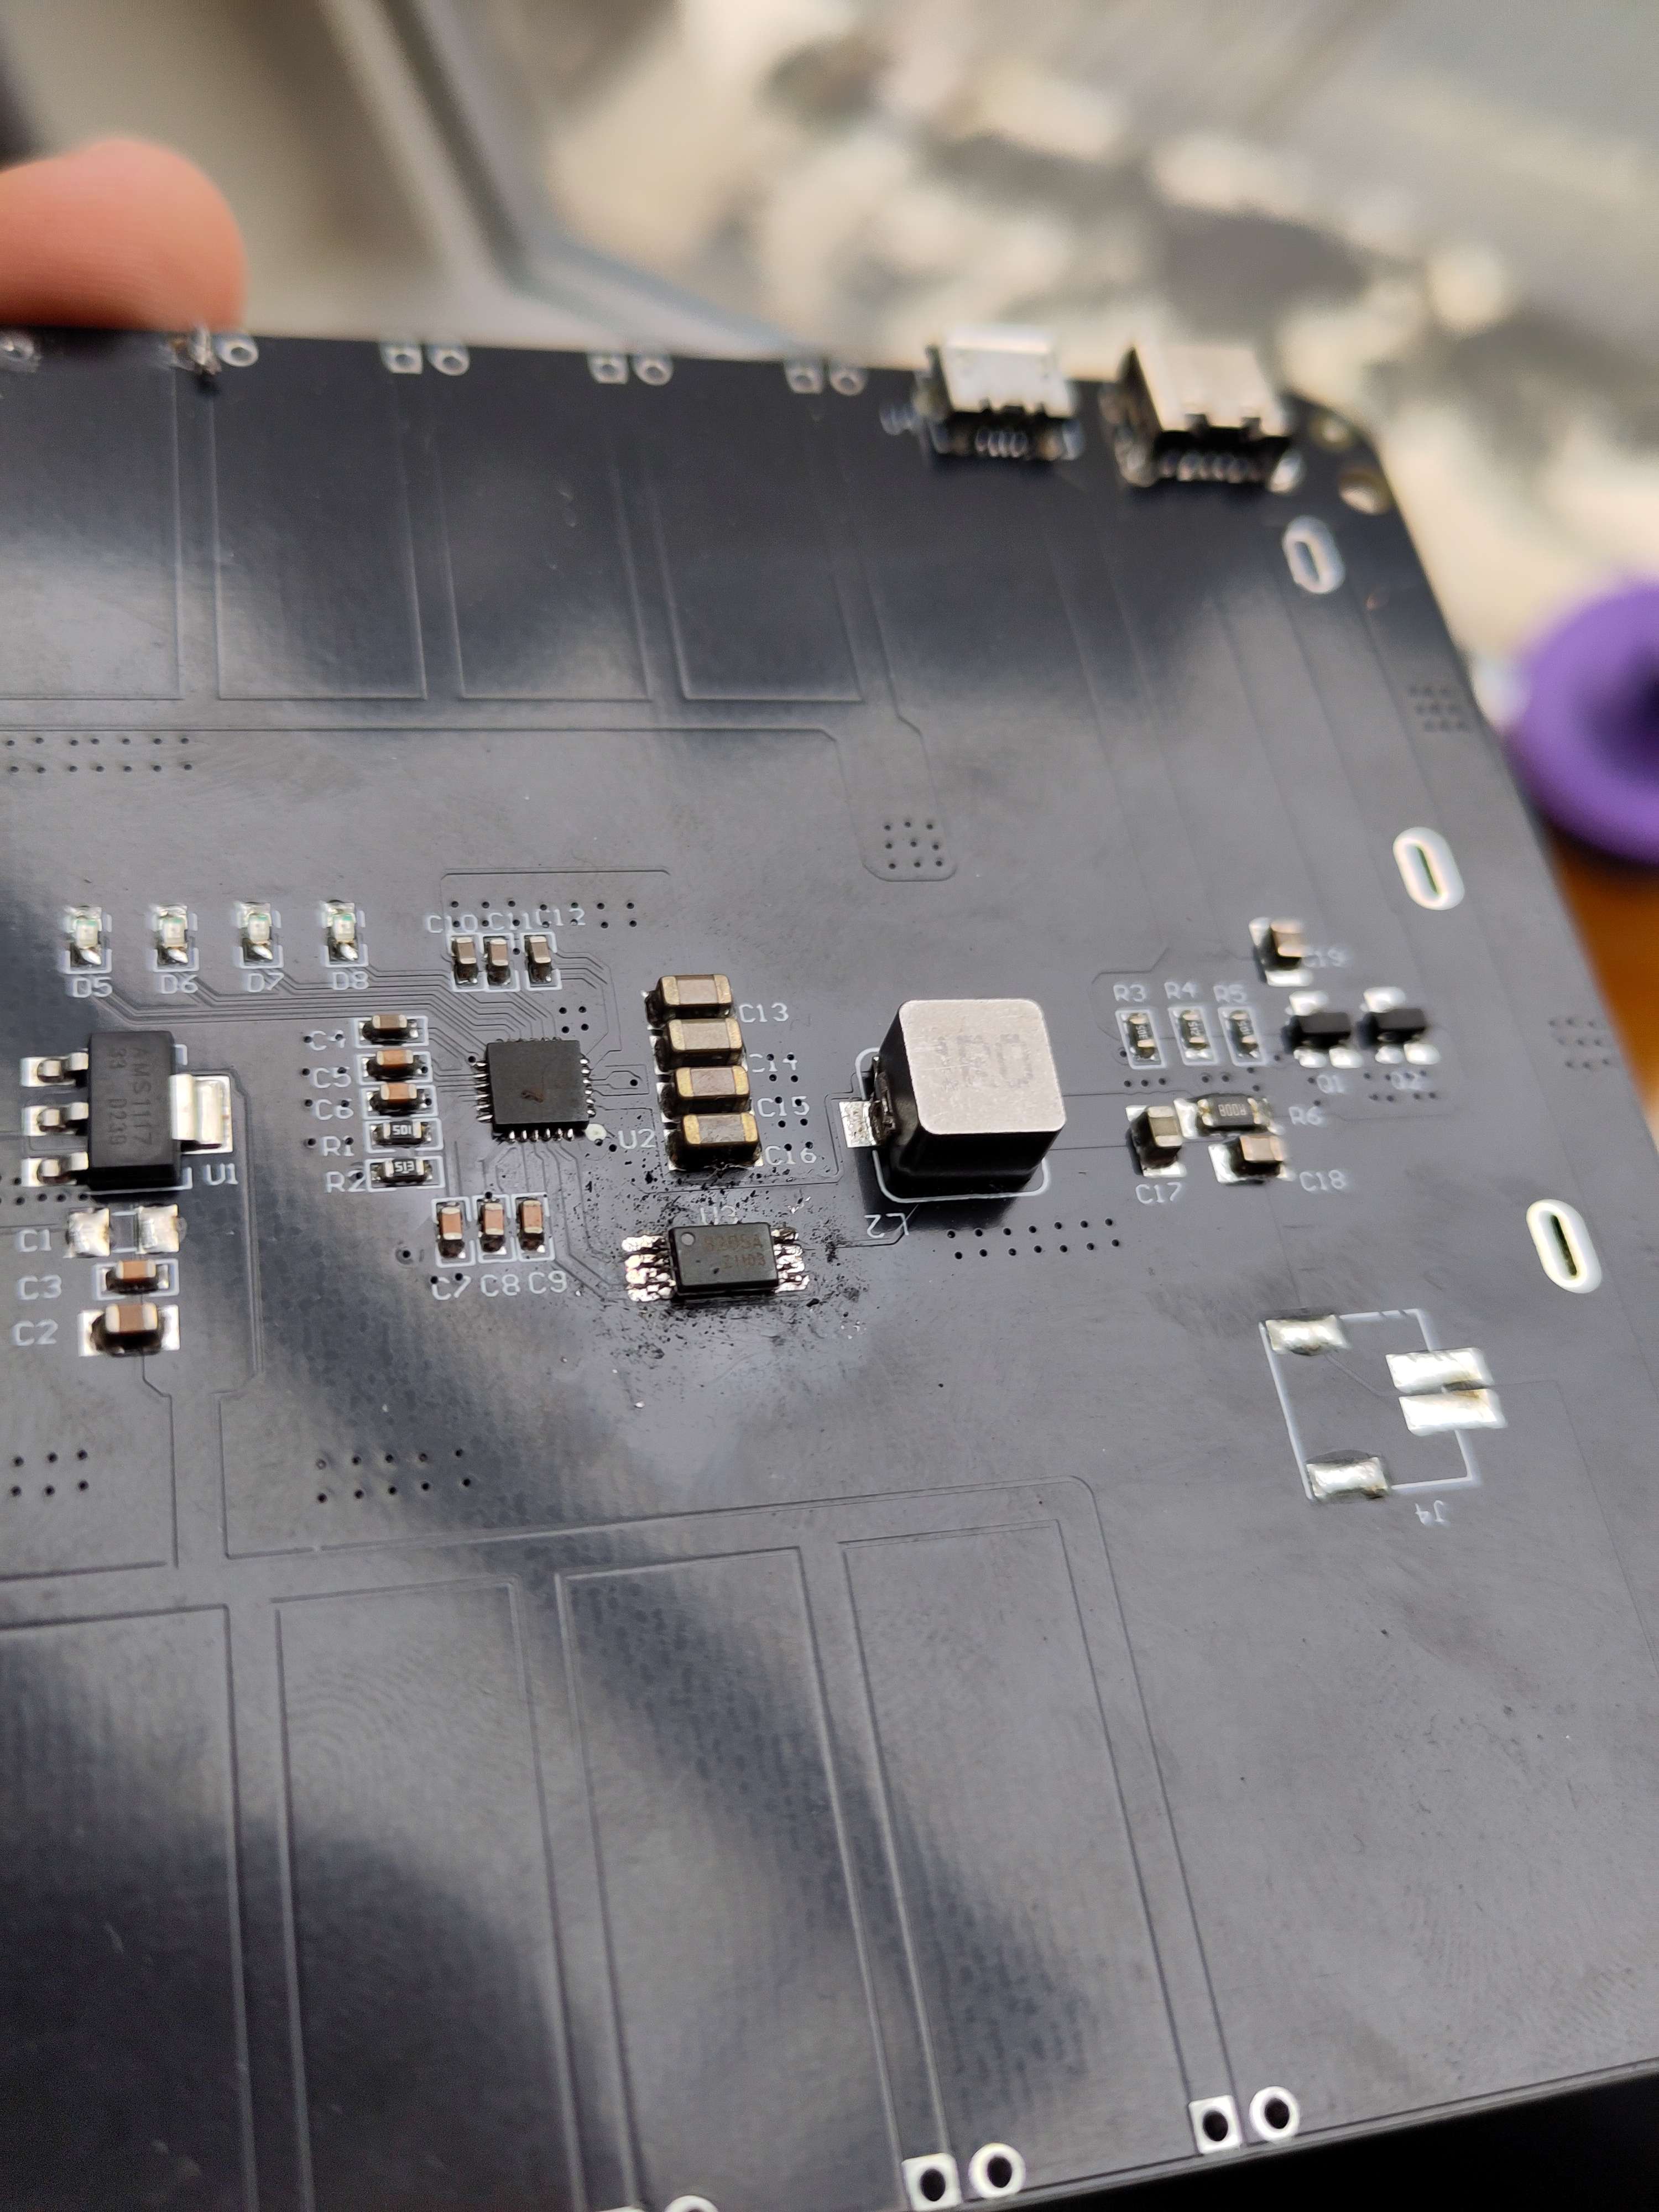
Since I've got back to University, a lot of progress has been made. The board was just repaired with the help of a university technician, they lent me a microscope for soldering some smaller components back in place and also let me use their heat-plate to remove and replace the broken chip. In this process a leg got snapped off another chip though! This chip cant be shipped in unless its from China, especially not in the time-frame I need. I'm going to try find one on another board somewhere. If I cant its just two mosfets in an ic so I'll try bodge something.
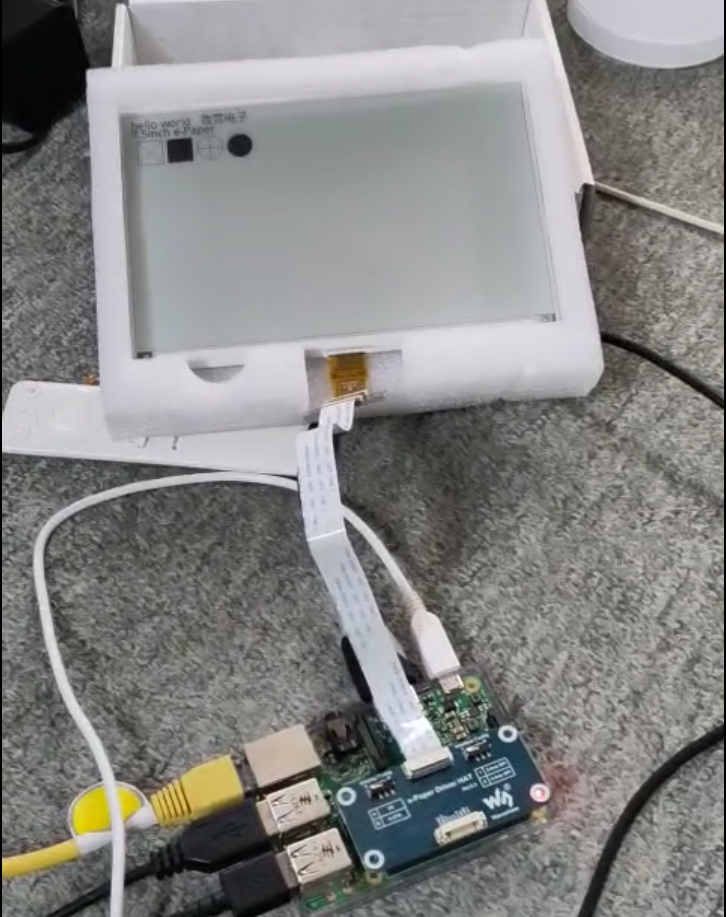
Outside of this, the E-Ink display is now working on Alpine Linux! This took a day or so of driver experimentation, you can find my notes on how to get this working here if you want to do this yourself. The screen can now run the demo, I also learnt the c library to use the drivers and logged that here (in a new category for the nav menu!). This library still needs implementing, for now I'm going to try use PaperTTY for the sake of time.
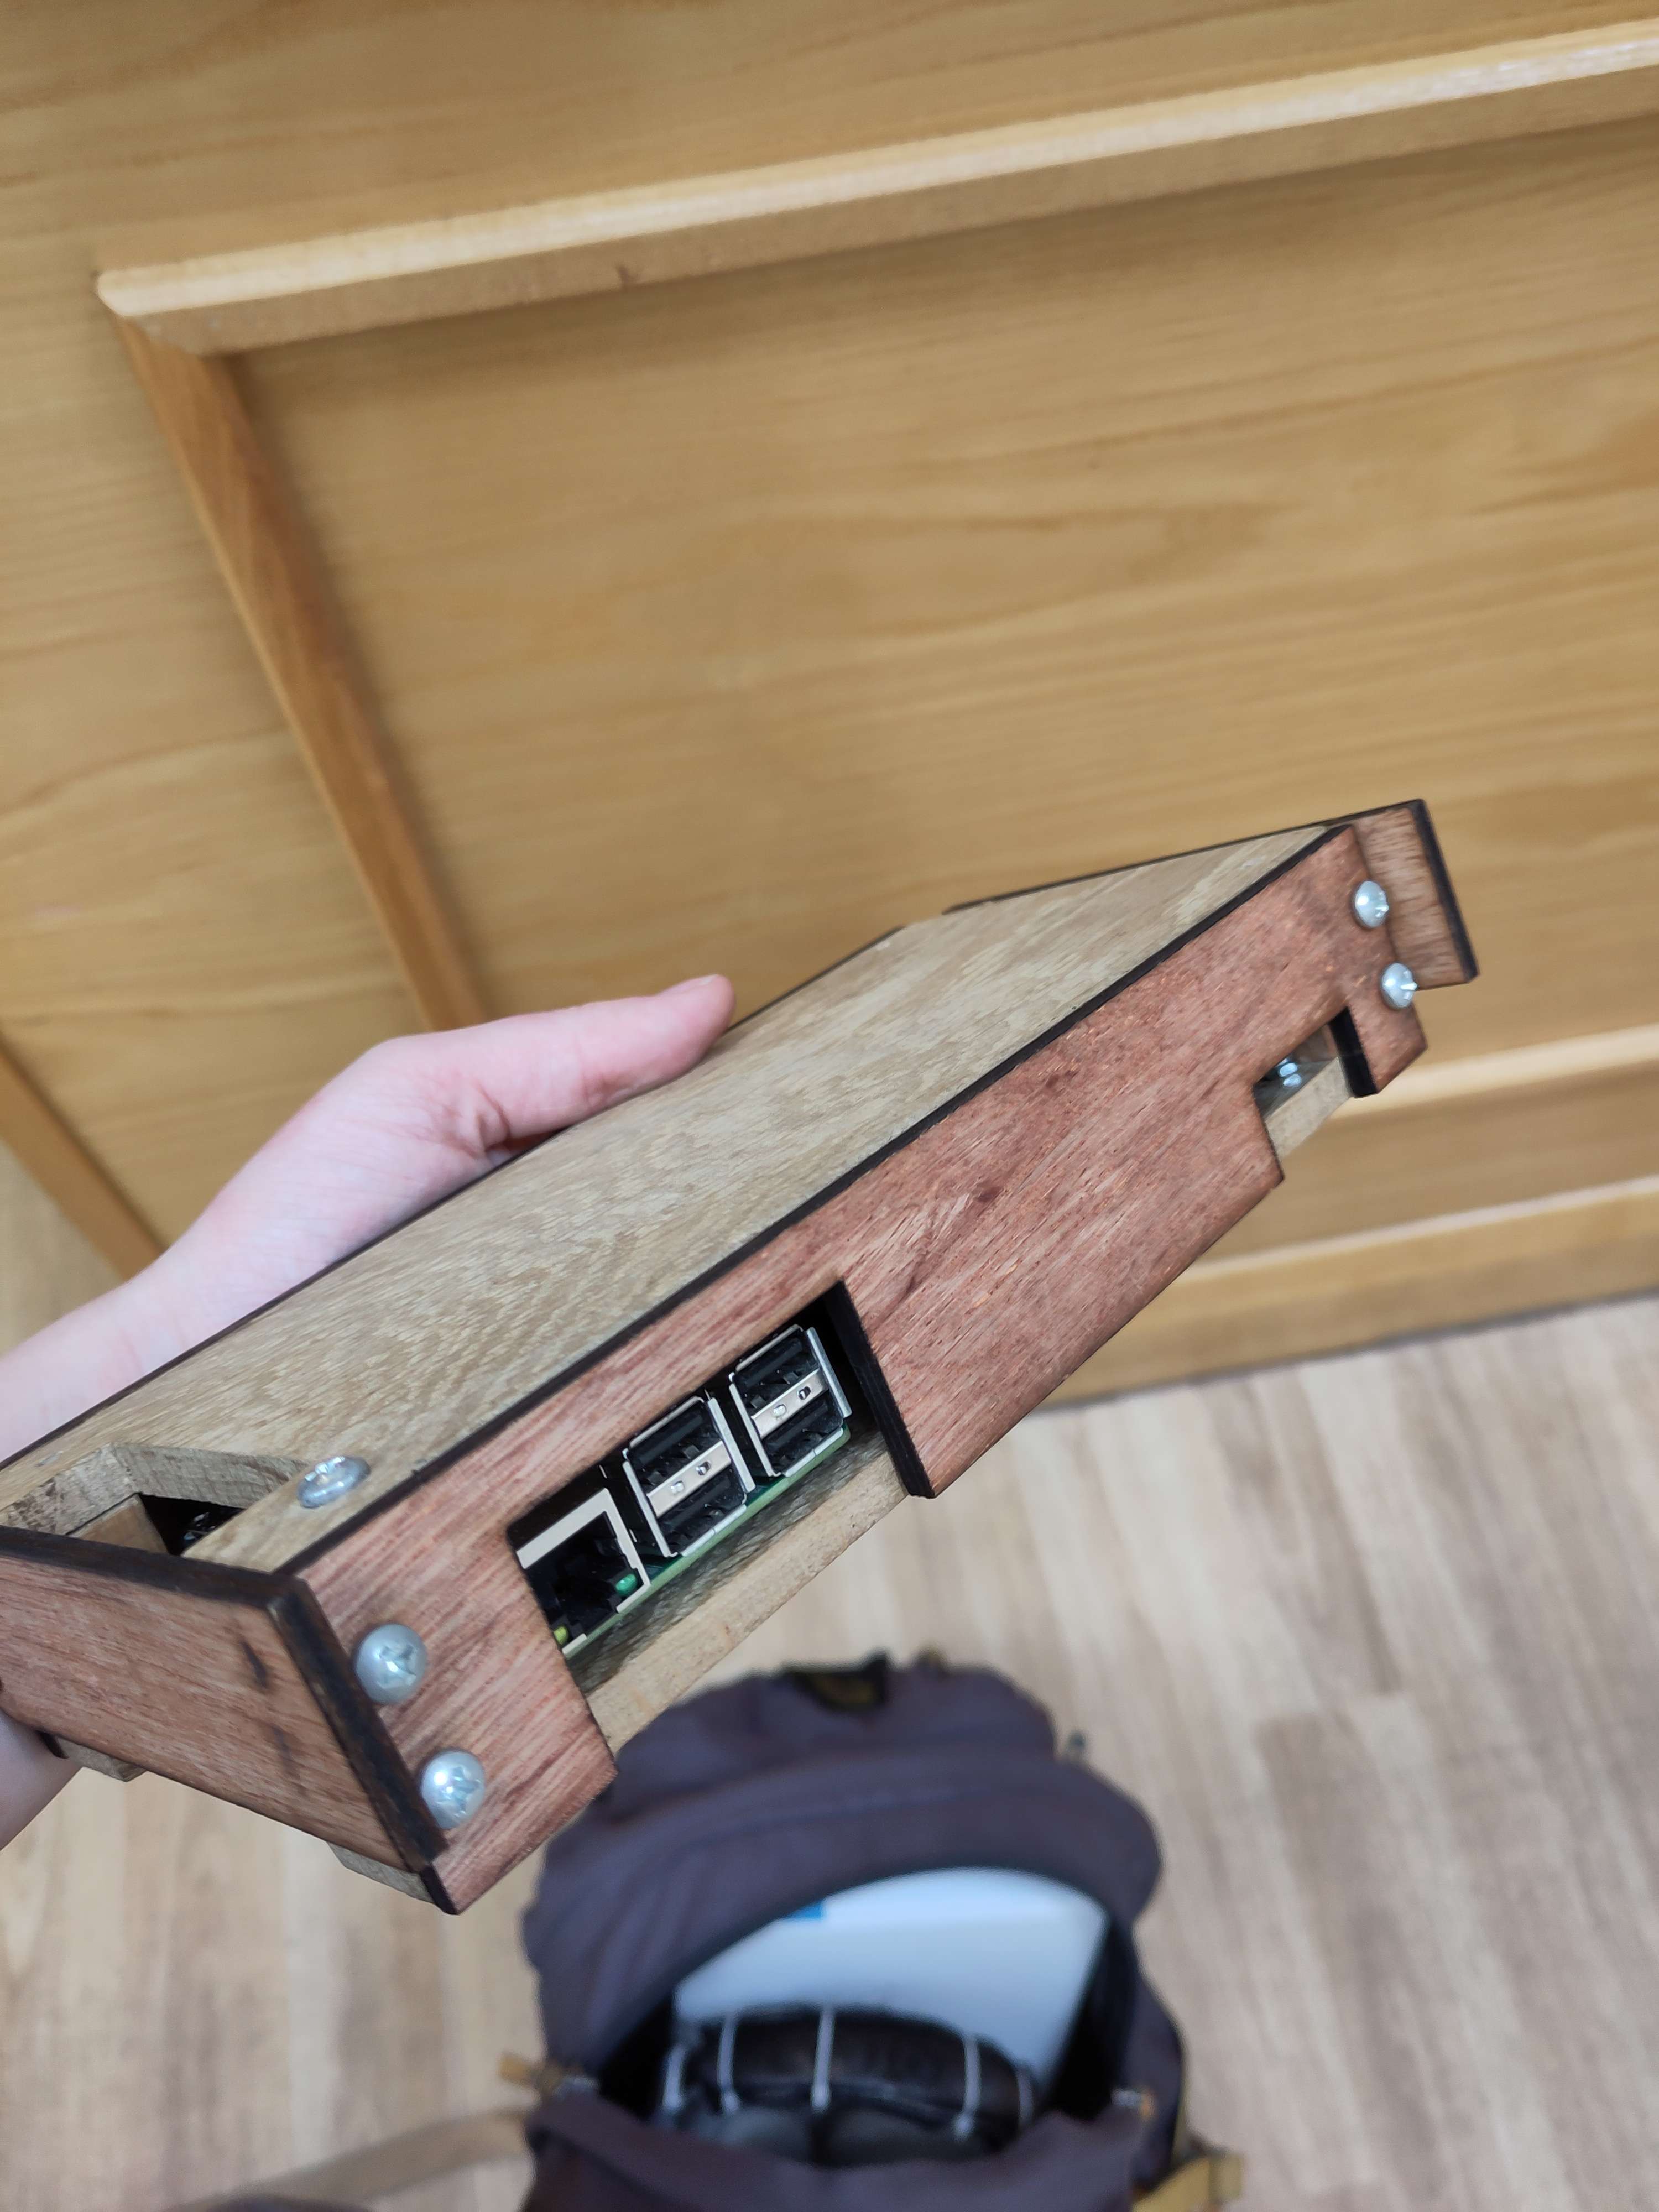
I also got most of the case finished off, the entire thing is fully modular save two pieces which involve glue (baseplate everything builds onto and an element of the screen base). All that's left to do on this is the cage around the screen which should be done soon. The University has a laser-cutter which I've been given access to and this massively sped things up.
An hour or so before uploading this update I was trying to get PaperTTY working and accidentally destroyed all the data on my Alpine setup. This sounds insane but its quite easy to do as I'm running Alpine diskless so no changes are saved until you run a specific commit command which creates an "overlay" that sits over the top of the normal system, and if this commit goes wrong it can destroy your previous overlay meaning you don't have one anymore. I always hear Linux users talk about checking backups and just backing up in general, now I've experienced first hand why.
I'm very lucky I saved my notes on how to get the E-Ink drivers working otherwise I would have had a terrible time. I've now realised I should be backing up my overlays and I've also created a setup script for getting certain things like the e-ink drivers working. When I'm sure this works I'll add it to my notes on setting up E-Ink drivers for Alpine
Nearly finished, left to do is:
- Finish the screen cage
- replace or repair the 8205a chip with the broken leg
- get PaperTTY working
Progress Update 26/05/2024 - all hardware done, screen drivers left to be finished
Firstly, I managed to find a replacement 8205a on E-Bay coming from Essex, this arrived and has been successfully soldered onto the board. One of its legs looks like its touching a pad it shouldn't but I checked it with a multi-meter and it seems fine.
Secondly, the screen cage is finished! it looks quite nice outside of the baseplate being made out of wood with an odd sheen finish to it. Its pretty sturdy and I'm surprised at how strong the hinge is for what is essentially just a screw.
Finally, the screen has been rewired to use individual cables for each pin rather than its hat, this gives me a whole set of gpio pins for me to use if I ever want to which is nice and it gives the board a bit more space.
I also got PaperTTY installed after a lot of installation error squishing and library hunting. I haven't tested it yet or put it on start-up but it seems to be installed fine. Next update will be the final one with the working device hopefully :)
Summary
This project's first working full version is nearing completion! Afterwards I intend to make small improvements but these won't likely be logged here. Keep an eye out for a rewrite of this page soon, this one will be archived